Are you trying to whip up a special birthday treat for your pup but realize you’re almost out of supplies? I’ve been there! That’s why I spent ages ensuring you don’t need a whole baking cabinet to make something festive. Trust me, keeping the ingredients few is what makes this 3-Ingredient Dog Frosting Recipe so ridiculously reliable every single time. It sets up beautifully, it’s dog-safe, and honestly, it takes less time to mix than it does to hunt down your dog’s favorite squeaky toy.
This recipe delivers that bakery look without the stress. If you’re looking for simple, frosted dog treats that go from zero to amazing in minutes, you’re in the right place. We only need three things!
Why This 3-Ingredient Dog Frosting Recipe Works for Busy Owners
When you’re a busy dog parent, you want results fast, but you never want to compromise on what your pup eats. That’s the beauty of this 3-Ingredient Dog Frosting Recipe. Because we’re keeping things minimal, cleanup is practically nonexistent, and you get that gorgeous decorative finish instantly.
This might be the most efficient way to make dog-safe frosting. It just proves that fewer ingredients often means better results, especially when you’re dealing with picky eaters!
- Super quick prep—we’re talking minutes here.
- Minimal mess, so you aren’t scrubbing bowls after every pup party.
- Dogs adore the light, creamy texture and natural flavors.
Quick Prep Time for Homemade Dog Icing
Seriously, the prep time is just five minutes. Five! That’s often less time than it takes me to find the right piping tip or clean up the flour dust from my last baking adventure. This speed is crucial because sometimes you realize Fido needs a little birthday celebration five minutes before company arrives. There’s no waiting for things to melt or boil here. You mix it, you top the treat, done!
Gathering Ingredients for Your 3-Ingredient Dog Frosting Recipe
The best part about this straightforward process is gathering what you need. Forget scouring the pantry for obscure items! When you trust the 3-Ingredient Dog Frosting Recipe, you know exactly what you are bringing into your kitchen. The ingredient list is so short, it practically writes itself. These simple components are sturdy and reliable, which is exactly what you want when you are aiming for dog freezer snacks that look professional.
You only need three things, and one ingredient is completely optional, which gives you flexibility right out of the gate!
Ingredient Clarity for Dog Cake Decorating
Let’s break down what you need so there are no surprises when you mix everything together. Remember, we are making something healthy, so quality matters even for just three things!
- Plain Yogurt: This must be plain, unsweetened yogurt. Don’t reach for the flavored stuff; we don’t want any extra sugars or sweeteners confusing Fido’s tummy. This acts as our creamy base.
- Mashed Banana: You need one tablespoon of banana, and I mean mashed until it’s practically baby food. A smooth consistency is non-negotiable for pretty dog cake decorating!
- Peanut Butter (Optional): If you use it, make sure it is safe! Check that label twice; it absolutely cannot contain xylitol, which is toxic to dogs. If you have any doubts, skip it entirely, which leads us nicely into those variations later on.
Step-by-Step Guide: Making the 3-Ingredient Dog Frosting Recipe
Okay, now that you have your beautiful, simple ingredients, let’s assemble this gorgeous topping. Mixing up this 3-Ingredient Dog Frosting Recipe is so straightforward, I almost feel guilty charging money for the instructions! We’re moving fast because we want that vibrant, fresh flavor, so grab your bowl and fork.
Here are the clear steps we take to get that perfect bakery look for your pup’s big day.
- First things first, we focus on the banana. Take that piece you measured out and mash it down until it’s completely smooth. We are not aiming for chunks here!
- Next, toss in your yogurt and if you decided to use it, that (xylitol-free!) peanut butter.
- Finally, take your fork or whisk and mix everything vigorously until it looks uniform.
The recipe is technically done after step three, but trust me on this one!
Achieving Smooth Consistency for Dog Cupcake Frosting
If your banana has lumps, your finished dog birthday cake decoration will look bumpy, and we hate lumps. I usually mash the banana on a plate first using the back of a sturdy fork, really pressing all those little fibers until it’s a true, creamy paste. Make sure you get every single lump out before you combine it with the yogurt base. This careful step is what elevates your homemade dog icing from homemade to *impressive* homemade!
Mixing and Setting Up the Healthy Dog Dessert Recipes Base
Once everything is combined well, you have two choices. You can use this frosting right away for a softer, more spreadable topping. If you need it firm enough to hold a pretty swirl on your dog cupcakes, toss the bowl into the refrigerator. Give it about 15 minutes of chilling time. This small rest allows the ingredients to firm up just enough for easy dolloping or piping!

Tips for Perfect Peanut-Free Dog Frosting Variations
What if your pup has sensitivities, or you just ran out of peanut butter? No problem at all! The beauty of the 3-Ingredient Dog Frosting Recipe base—yogurt and banana—is how adaptable it remains. If you are aiming for a truly peanut-free dog frosting, swapping out that optional tablespoon is super easy.
I often swap the peanut butter for something nutty but safe. Try using a half-teaspoon of sunflower seed butter, or, if you want something completely different, use a tiny bit of plain, unsweetened pumpkin puree. This keeps that rich texture we love for dog cake decorating.
My personal favorite tip for keeping the frosting vibrant, especially when adding fruit flavors like those in my strawberry coconut cups, is to chill the yogurt for an hour before mixing. Cold yogurt whips up a little stiffer and holds its shape better right out of the bowl for your next great dog dessert project!
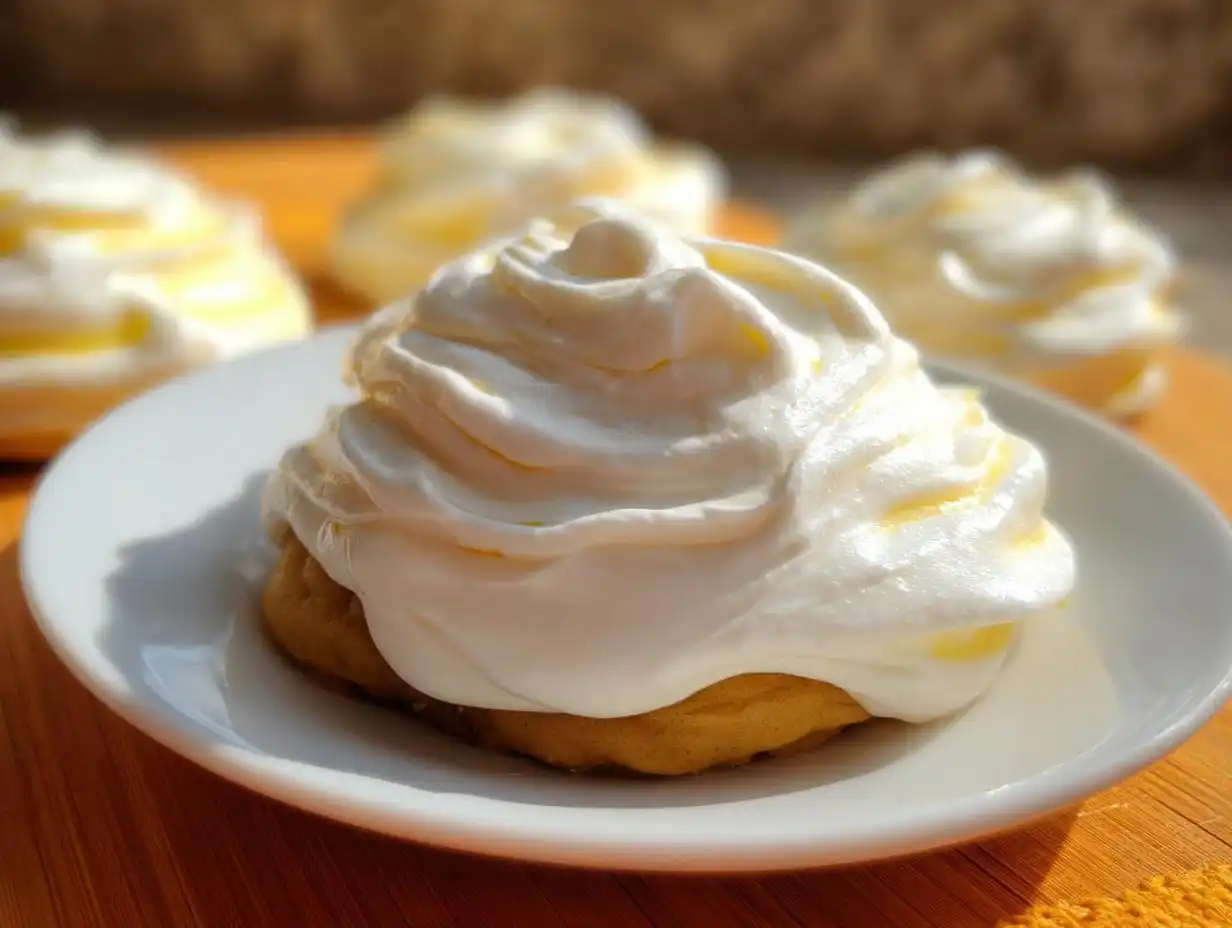
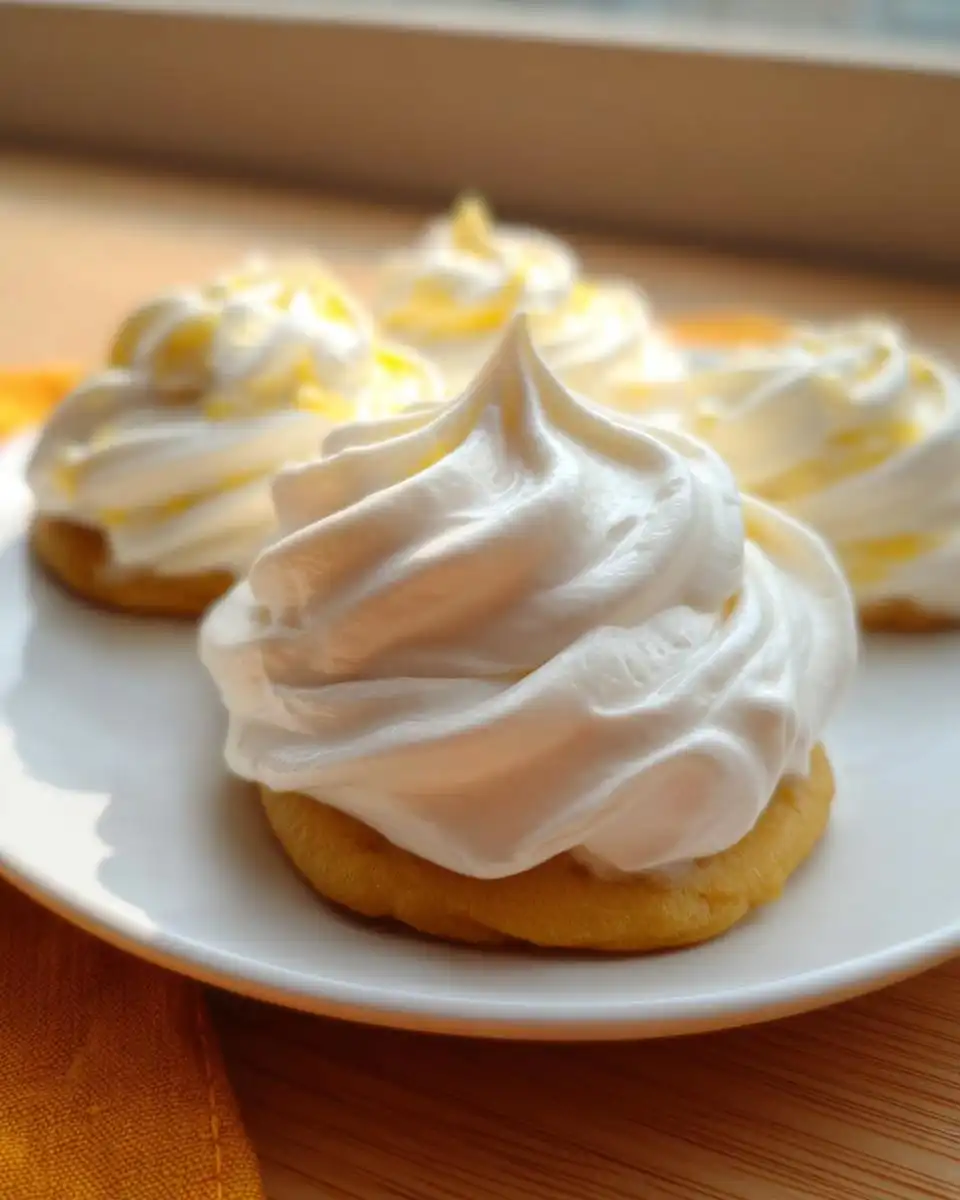
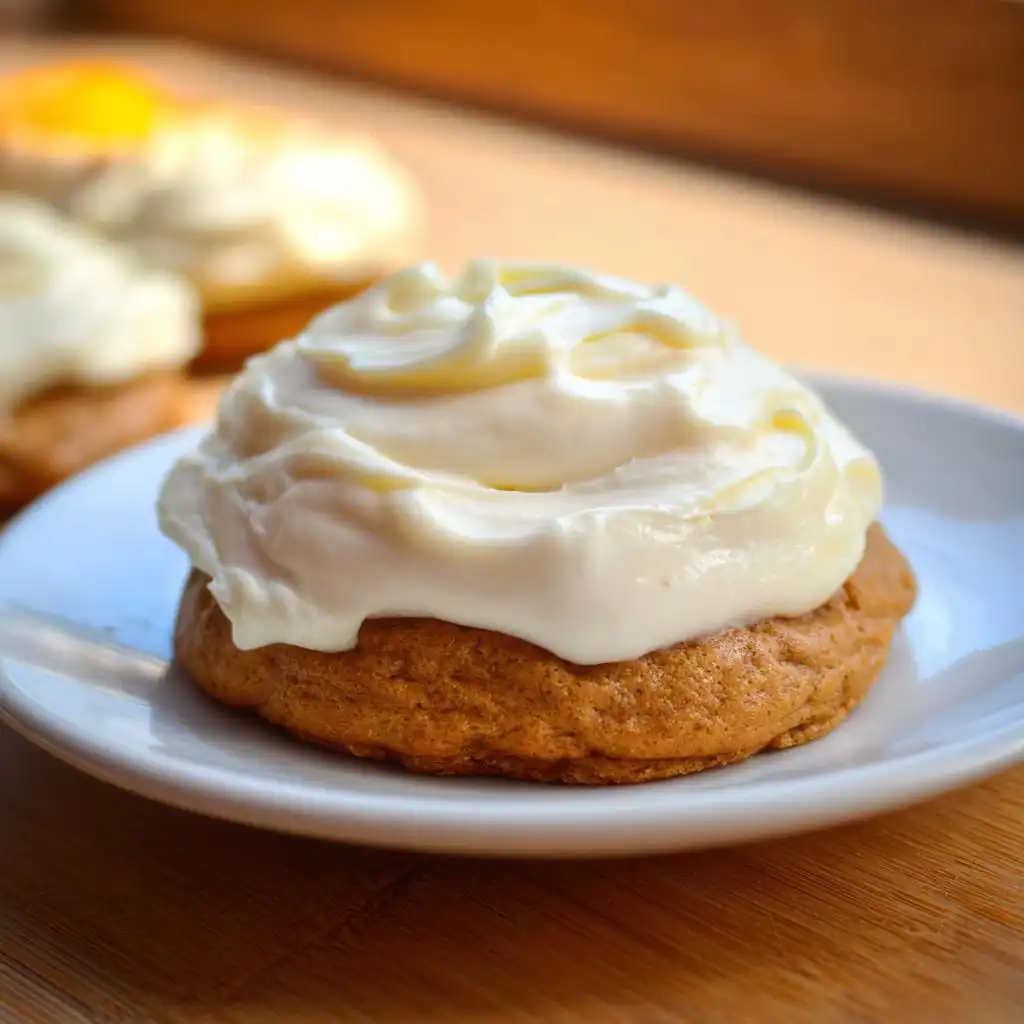
Using Your 3-Ingredient Dog Frosting Recipe for Bakery Style Dog Treats
Now that you have this perfect, fluffy batch of 3-Ingredient Dog Frosting Recipe ready, it’s time for the fun part: decorating! This icing is fantastic for either spreading a thick, luscious layer over a plain biscuit or getting fancy with a piping bag to create those amazing swirls you see on professional pupcakes.
If you’re spreading, just use the back of a spoon, but if you want those beautiful defined edges, make sure you chilled that mixture for the full 15 minutes we talked about earlier! If you chilled it too long and it got stiff, don’t panic. Just stir in one single drop of water or a tiny bit more mashed banana. If it seems too soft to hold a peak, pop it back in the fridge!
This simple base makes achieving that authentic, bakery style dog treats look incredibly easy. Just remember the texture dictates your success!
Storage and Handling for Homemade Dog Icing
Alright, let’s talk about what happens after the decorating is done, because no one wants to waste a single dollop of this yummy homemade dog icing. Since we are relying on yogurt here—which is great for your dog’s tummy!—we do have to pay a little more attention to freshness than if we were using shelf-stable powdered sugar icing.
You absolutely have to keep any leftovers refrigerated. I usually mix up a batch right before I decorate, and honestly, it stays perfectly good in a sealed container in the fridge for about three or four days. If you notice any separating or sour smells, just toss it; better safe than sorry when it comes to your best friend’s snacks!
Freezing this specific frosting is a bit trickier, and in my experience, it doesn’t hold up well. When yogurt thaws, it can sometimes get a bit watery or grainy, which ruins that beautiful, creamy texture we worked so hard to achieve. When I make big batches of homemade dog food recipes, I freeze the cake base instead of the icing.
For the best results, I really recommend only making what you plan to use within a day or two. It whips up so quickly that even if you only need a spoonful to top a single training treat, it’s always worth making it fresh!
Frequently Asked Questions About the 3-Ingredient Dog Frosting Recipe
I get so many questions about making sure these simple recipes are perfect for every pup! Since the 3-Ingredient Dog Frosting Recipe is so minimal, people want to know about substitutions and safety first, and I totally get that. Here are the things I hear most often from other dog parents trying to achieve beautiful DIY dog cake recipes.
Is this 3-Ingredient Dog Frosting Recipe safe if I skip the optional peanut butter?
Absolutely, yes! If your dog has an unknown allergy, or you just skipped the peanut butter as an option, the frosting is still perfectly safe and delicious. The core two ingredients—yogurt and banana—create a fantastic, creamy base for healthy dog dessert recipes. It’s a great way to make sure your homemade dog icing is perfectly personalized and safe for sensitive tummies.
What is the best base treat to use this Homemade Dog Icing on?
Honestly, the sky’s the limit, but simplicity wins for this quick frosting! I love swirling it on plain, air-dried dog biscuits—they look instantly upgraded! It also looks amazing dolloped on slices of plain, baked sweet potato or even on top of cooled, unsweetened pumpkin dog cookies. This icing really shines because the base treat is sturdy enough to hold the creamy topping!
Can I make a different flavor of Dog Cupcake Frosting using this base?
You totally can experiment while still keeping this a 3-Ingredient Dog Frosting Recipe concept! I sometimes swap the banana for 1 tablespoon of unsweetened, canned pumpkin puree, which is especially great in the fall. Just make sure your yogurt is thick, or it might get too runny. If you do substitute, taste the base first to make sure it still has that sweet flavor your dog loves!
Author Insight: Trustworthiness in DIY Dog Cake Recipes
When I’m developing recipes here for Happy Pup Kitchen, my biggest goal is always making sure you, the busy dog parent, feel confident about what you’re serving. That’s why I love testing things down to the bare essentials, leading to great options like the homemade dog treats we’ve been talking about.
For me, trustworthy cooking means transparency. If I wouldn’t feed it to my own pups, Buster and Daisy, it doesn’t leave my testing area. This frosting, for example, feels so reliable precisely because it uses ingredients I know are safe and that I can quickly verify on the label.
By Maya Thompson – Dog Mom & Recipe Tester. Maya Thompson is a devoted dog mom who loves testing and refining recipes for Happy Pup Kitchen. She focuses on treats that combine nutrition and flavor, making them a joy for pets and reassuring for their owners. Through her work, Maya helps ensure every recipe is approachable, trustworthy, and a perfect fit for a healthy pup’s diet.
Share Your 3-Ingredient Dog Frosting Recipe Creations
I am so excited for you to try this simple frosting! Honestly, the biggest reward for me is seeing your happy dog enjoying the treats.
Once you’ve used this dog cake recipe creation, I would absolutely love to hear about it. Did your pup even wait for you to finish decorating? Did they prefer it spread thin or piped high?
Please take a moment to leave a rating for the 3-Ingredient Dog Frosting Recipe at the top of the page—five stars if it saved your day! And if you managed to snap a photo of your perfectly decorated DIY Dog Cake Recipes, share it with us in the comments below! It really makes my day to see your amazing decorating skills with this dog-safe frosting.
3-Ingredient Dog Frosting Recipe
Ingredients
Equipment
Method
- Mash the banana until you achieve a smooth consistency.
- Mix the mashed banana with the yogurt and the optional peanut butter.
- Use the frosting immediately, or place it in the refrigerator for 15 minutes before use.