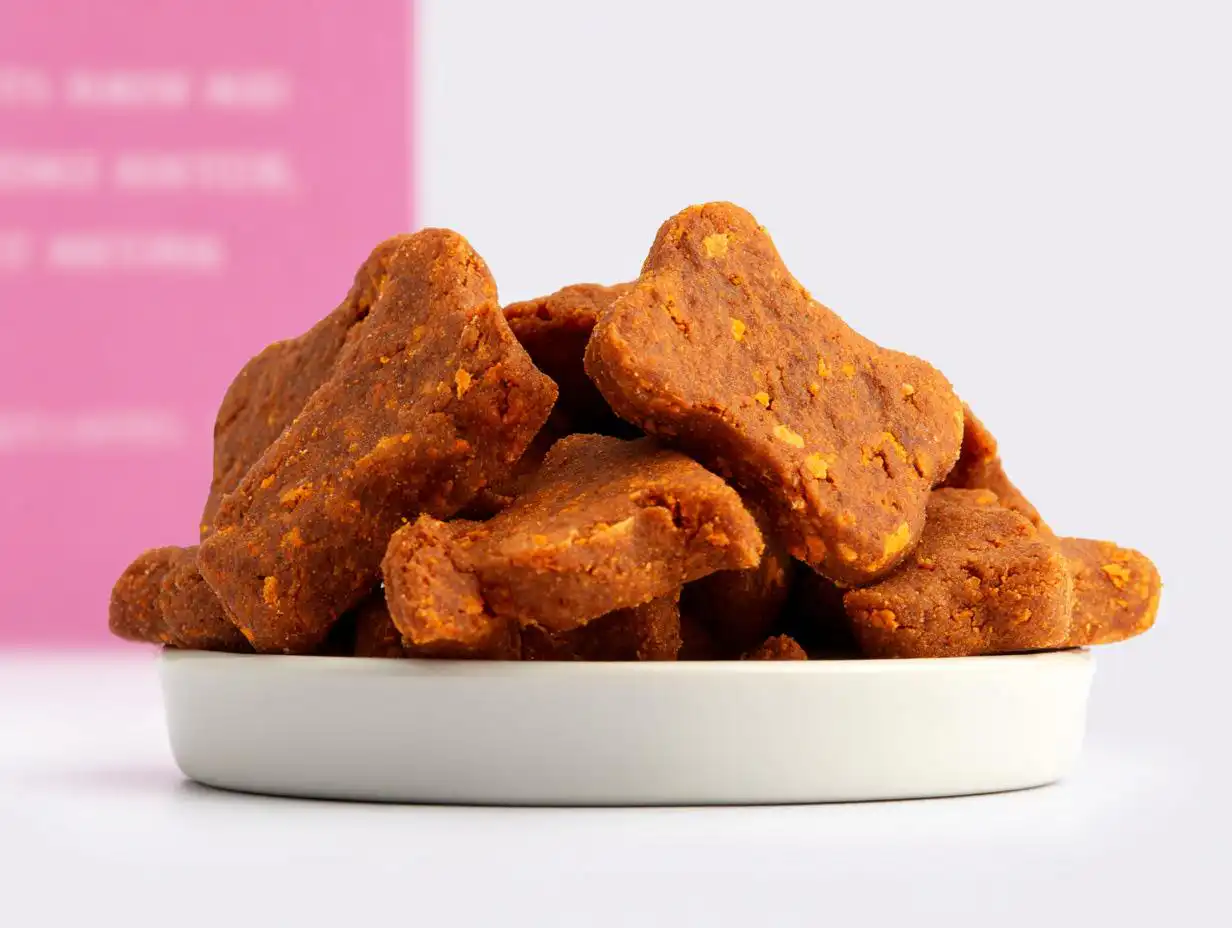
Watching your best friend slow down, maybe hesitating before jumping onto the sofa, is just the worst, isn’t it? It really makes you think about what you can do from the kitchen to help them keep up their happy pace. That’s exactly why I developed these super simple, functional Joint Support Dog Treats. I started making them after learning just how much nutrition can impact a dog’s mobility and overall joint comfort. Trust me, you don’t need a fancy lab to help your pup! We’re focusing here on targeted nutrition to keep those tails wagging strong well into their golden years. Think of these as little chewy powerhouses!

If you’re looking at improving their daily comfort, these are the easiest functional dog treats you’ll ever whip up. We’ll keep a close eye on specialized ingredients that help inflammation, which is the goal of any good functional recipe. If you want some more reading on why joint health is so important for dogs, you can check out some info over at VCA Hospitals. This article really opened my eyes to preventative care! Our main objective today is whipping up a batch of amazing, easy-to-make Joint Support Dog Treats that your dog will absolutely love.
For baking recipes that use turmeric like these bites, I have another favorite recipe you might want to save for later too: Turmeric Pumpkin Dog Bites. These are slightly different but pack a similar punch!
Why These Joint Support Dog Treats Are Essential for Mobility
Look, our dogs give us everything—their boundless energy, their silly cuddles, everything! When they start getting stiff, we owe it to them to step up our game in the kitchen. That’s where using functional dog treats really shines. These aren’t just empty calories; they are specifically designed to support their body where they need it most. Think of this batch as your dog’s daily spa treatment!
For any aging dog or the super active pup who plays hard at the park every weekend, these treats become essential healthy dog snacks. We’re sneaking in ingredients that actively help reduce inflammation around the joints. It’s proactive care! If you’re looking for something a little softer that focuses on inflammation, I’ve got my recipe for Anti-Inflammatory Turmeric Dog Cookies that you should bookmark too.
It’s about making sure those daily walks stay joyful, not painful. Keeping things consistent with these little reinforcements really makes a difference in their long-term mobility. That’s the real payoff for mixing up a batch!
Gathering Ingredients for Your Joint Support Dog Treats
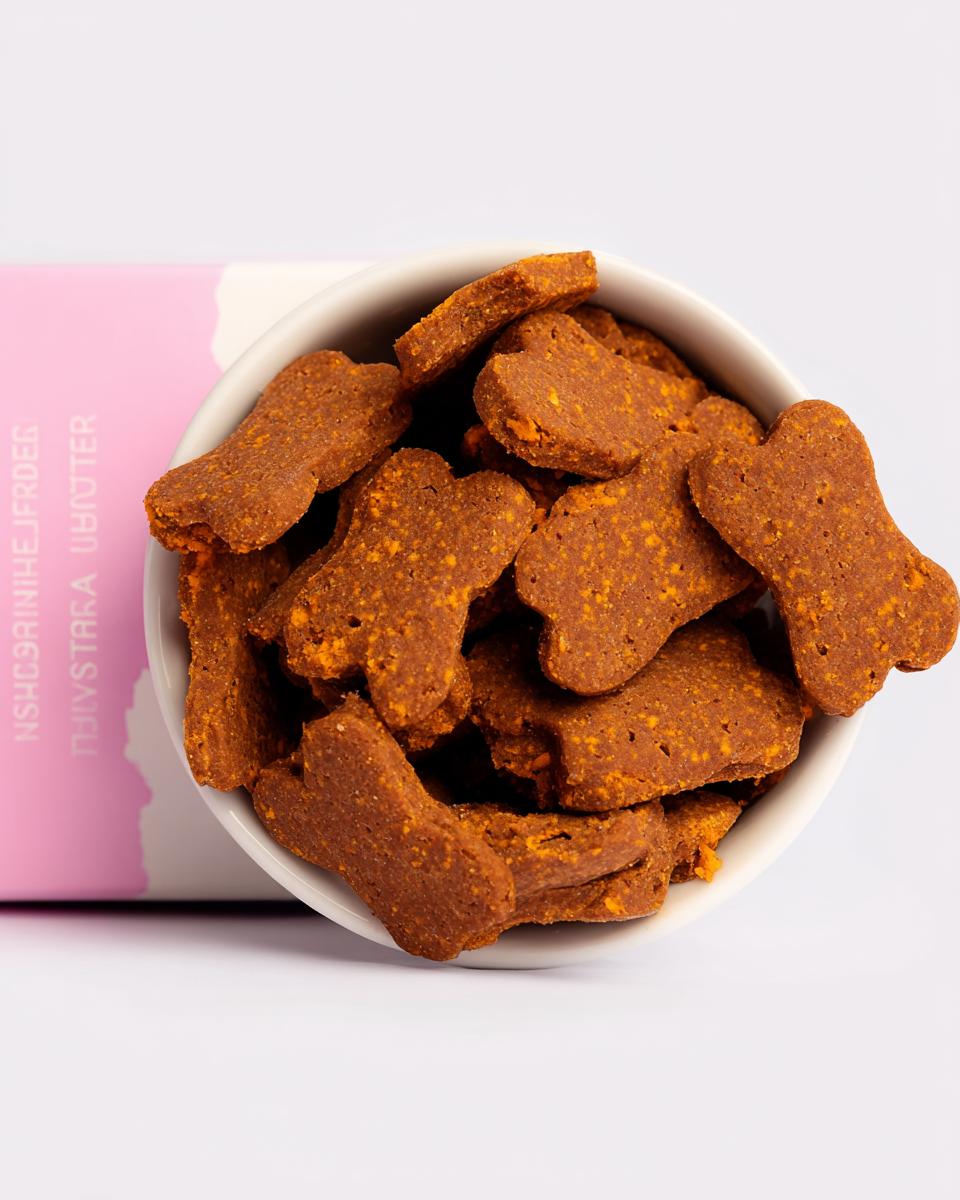
Okay, this part is my favorite because it’s where we load up on the good stuff! Making these Joint Support Dog Treats requires just four super basic things, and you probably have most of them in your pantry right now. No weird supplements or hard-to-find powders here—just real food doing a real job. It takes about ten minutes tops to get everything together before they even hit the oven.
When we talk about boosting mobility, we need ingredients that work hard. Pumpkin puree is fantastic for digestion, but here, it acts as a wonderful binder and adds moisture. And speaking of powerful players, we’ve got turmeric! This bright yellow spice is my absolute go-to for keeping inflammation in check. Think of it as nature’s little anti-inflammatory warrior, which is why I always make sure it’s finely ground and totally fresh when I add it. Speaking of my favorite turmeric recipes, check out my recipe for Turmeric Pumpkin Dog Snacks for another great option!
The great thing about these healthy dog snacks is their simplicity. They prove you don’t need ten different vitamins in a pill form when you can bake them right into a tasty reward.
Specific Ingredient Measurements for Joint Support Dog Treats
When you measure out your components, just try to be accurate! Consistency is key when baking, even for dogs. Here is exactly what I use for one solid batch:
- You’ll need exactly 1/2 cup of pumpkin puree. Make sure it’s pure pumpkin, not pie filling—that’s super important!
- One single, large egg to bind everything up tight.
- Next is 1 cup of oat flour. If you don’t have oat flour, no sweat, you can just blend rolled oats until they look powdery, about the same consistency as all-purpose flour.
- Finally, for the joint magic, we add exactly 1/2 teaspoon of turmeric. That little bit packs a punch!
Get all of these goodies ready, and we are practically halfway done!
Step-by-Step Guide: Making Amazing Joint Support Dog Treats
Alright, let’s get these baked so your best friend can start enjoying their new favorite rewards! These Joint Support Dog Treats come together so fast, I promise you won’t even need to pull out your big stand mixer for this one. Just a good old mixing bowl and maybe a spatula if you’re messy like me!
Preparing the Dough for Your Functional Dog Treats
First things first: heat up that oven to 350°F. Don’t skip this! While it’s warming up, grab your pumpkin, your egg, your oat flour, and that bright yellow turmeric. Dump them all into your mixing bowl. I usually start by whisking the wet things—the pumpkin and egg—just until they’re combined.
Then, gently work in the dry ingredients. You want to mix this until it just comes together into a nice, smooth, but slightly firm dough. Don’t over-mix it! We aren’t making bread here. Once you can roll it into a manageable ball, we’re good. If it’s too sticky, add a tiny sprinkle more oat flour. If it feels too crumbly, just add a *tiny* drop of water. Then, roll it out and use a cookie cutter or just flatten spoonfuls into little discs on your baking sheet. Simple as that!
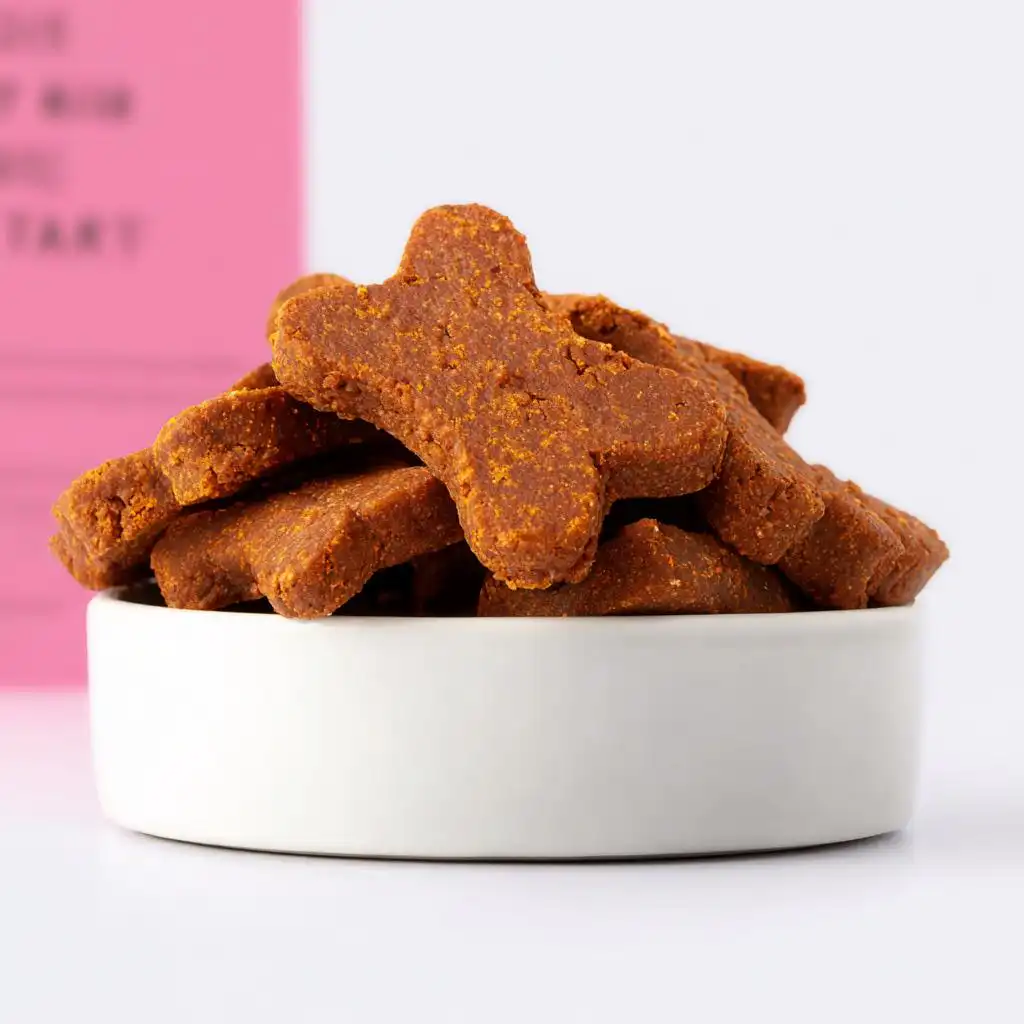
Baking and Cooling Your Joint Support Dog Treats
Time for the heat! Pop those trays into that preheated oven. These only need about 15 to 18 minutes. Keep an eye on them, though, because every oven is a little different. You’re looking for them to be firm to the touch and maybe just starting to look a little golden around the edges—but they shouldn’t be rock hard, since these are nice, soft functional dog treats.
Now, here’s the most important part for texture and safety: cooling! When they come out, they will feel soft. You absolutely must let them cool completely on a wire rack before you serve even one! This cooling time lets them set up properly, so they have the perfect chewing consistency for your dog. If you serve them hot, they might fall apart! When you’re done, maybe bookmark my guide on Soft Oat Dog Cookies for another easy bake.
Tips for Perfect Joint Support Dog Treats Every Time
Even with just four ingredients, baking is science, and sometimes you need a little tweaking! I’ve made this recipe dozens of times, and I’ve learned a few tricks that make sure you get that perfect, chewy texture every single time you make these Joint Support Dog Treats. You want them to be satisfying, not crumbly!
If your mixture ends up a little too sticky to handle—and this usually depends on how wet your pumpkin puree was—don’t panic and don’t dump in more pumpkin! Just add another tablespoon of oat flour at a time until you can easily roll a small ball in your hands without it sticking everywhere. Handling dough that’s too wet is just frustrating. Also, if you are thinking about adding other ingredients, remember that these are powerful dog supplements treats, so introduce new things slowly.
My biggest expert tip revolves around that beautiful turmeric. When you toss it into the wet ingredients, make sure you mix it really well *before* you add the flour. We need that anti-inflammatory power distributed evenly! You don’t want one dog getting a huge clump of spice in their treat, right? For more reading on how diet impacts joint health, I found this article really helpful for understanding the ‘why’ behind these kinds of recipes.
Also, don’t crowd your baking sheet! Give the treats a little space between them. When they bake, they don’t spread much, but they do need room for the hot air to circulate properly around the entire base. This ensures they bake evenly and you don’t end up with soft, raw middles. If you want to see other recipes where I focus heavily on turmeric benefits, check out my Turmeric Joint Support Dog Treat Bites!
Ingredient Notes and Substitutions for Healthy Dog Snacks
I get so many questions about substitutions, especially since we are aiming for specific benefits in these healthy dog snacks. The thing about baking for joint support is that we want the core ingredients to stay stable so the turmeric can do its job without interference. If your pantry is looking a little bare, sometimes swaps are necessary! But we have to be smart about it so we don’t wreck the texture or the functional outcome of these amazing Joint Support Dog Treats.
Let’s talk about the binder first—that pumpkin puree. If you happen to be out of pumpkin, or maybe your dog has a slight sensitivity to it, don’t worry! You can definitely sub in an equal amount of plain, cooked sweet potato puree. Just make sure it’s completely smooth and cooled down before you mix it in. Sweet potato works just as well as a binder and still offers great vitamins. If you want to see a great recipe that uses sweet potato as the star, I highly recommend checking out my Sweet Potato Soft Dog Cookies Recipe!
Now, the flour situation. Oat flour is my first choice because it’s gentle on most tummies and keeps the texture nicely soft. If you absolutely cannot make oat flour at home—remember, that’s just blending oats until fine—you could try using whole wheat flour as a last resort. However, if you swap to whole wheat, your treats might bake up a little denser and less crumbly than mine did. For this recipe, wheat is technically not my preferred choice for these functional dog treats, but it works in a pinch if you need to get them made right now!
Keep in mind that any substitution might slightly change how much water or flour the dough needs, so always use your judgment during that mixing step. When in doubt, sticking to the original recipe guarantees the best results for your dog’s joint health support.
Storage and Reheating Instructions for Joint Support Dog Treats
Making a big batch of these Joint Support Dog Treats is smart because they freeze like a dream! Since these aren’t loaded with artificial preservatives, how we store them makes a huge difference in keeping them fresh and safe for our pups. We want them to stay chewy and delicious, not dry out or go stale too fast.
For short-term storage—say, if you plan on giving them out over the next week—you can keep them in an airtight container on the counter. Since they have a decent amount of moisture from the pumpkin, they generally last about 5 to 7 days at room temperature. That’s usually enough time for a busy week of training rewards or quick supplements!
If you are like me and you want to make a double or triple batch because, let’s be honest, my dog eats them fast, the freezer is your best friend! Lay the cooled treats out on a baking sheet first, just like you would if you were freezing cookies. Let them firm up individually for an hour or two. This stops them from clumping together into one giant, pumpkin-spice hockey puck. Once they are hard, transfer them to a heavy-duty freezer bag. You can easily grab what you need and keep these Joint Support Dog Treats good for up to three months!
If you need one fast, you don’t even really need to reheat them, but if your kitchen is cold and you want them perfectly soft, just let a handful sit on the counter for about 20 minutes before you serve them. If you’re making these ahead of time for a busy month, you might want to check out my tips on Make-Ahead Senior Dog Treats for general best practices!
Frequently Asked Questions About Functional Dog Treats
I know you might have some questions brewing now that you’ve seen how easy it is to make these specialized snacks! Folks always ask me about frequency and safety when dealing with functional dog treats. It’s great that you’re being so thoughtful about what you give your pup!
How often is it safe to give my dog these Joint Support Dog Treats?
Since these are designed as a supplement to their main food, you can usually give them a few times a day as training rewards, just like any other snack. However, remember that turmeric is potent! I usually stick to giving my dog about 2 to 3 treats per day, depending on his size and activity level. Always monitor your dog when introducing any new food item, even if it’s just a tasty treat like this one! If you are worried about digestion, I’ve got some great tips over at my Sensitive Stomach Dog Treats guide that might help you manage any initial stomach upset.
Are these healthy dog snacks appropriate for puppies?
That’s a smart question. Puppies are still growing, and their systems are very sensitive! Because we formulated these specifically with ingredients that support joint maintenance for adult or senior dogs, I generally advise waiting until your puppy is fully grown—usually around 12 months—before introducing them regularly. Their puppy food is carefully balanced for their growth plates, and overloading their system with extra supplements, even natural ones like turmeric, just isn’t necessary at that stage. Keep it simple for the little ones!
Can I omit the turmeric if my dog gets messy?
Oh, the yellow stains! I totally get that concern. Turmeric is fantastic, but it stains *everything*! You certainly *can* skip it, but you’ll lose the primary anti-inflammatory boost that makes these Joint Support Dog Treats so beneficial for their joints. If you must skip it, add an extra pinch of cinnamon or ginger just for flavor, but understand they won’t be the same powerful joint support treats. If you are worried about staining your kitchen, you might prefer something milder, like my recipe for Senior Dog Soft Snack Muffins which uses different boosters.
What can I do if these treats turn out too crumbly?
A crumbly treat usually means one of two things: either you baked them a little too long, or your dough was slightly too dry when you shaped it. If they are super crumbly right out of the oven, don’t throw them away! Let them cool, then you can easily repurpose them. Just toss the broken bits into a food processor and pulse until you have coarse crumbs. You can then mix those crumbs with a tiny splash of water or broth and press them firmly into a small pan to make a solid ‘bar’ that you cut up. That works great for a quick fix!
Serving Suggestions for Your Homemade Joint Support Dog Treats
So you’ve got a fresh, chewy batch of amazing Joint Support Dog Treats cooling on the rack! Now what? The best part about making your own functional snacks is you get to weave them right into your daily routine exactly where your dog needs the biggest boost.
These treats are wonderful for two main jobs. First, because they are small, delicious, and easy to chew, they make spectacular, high-value training rewards. Forget those boring dry biscuits when you’re working on a new trick! Using these treats means you’re sneaking in joint support even during a quick five-minute training session in the yard. For even faster training rewards, you might want to check out my recipe for 10-Minute Soft Training Treats for Dogs, though these joint support ones are great too!
Second, I treat these almost like a little daily vitamin booster. If your dog is a senior or an active athlete, giving them one or two of these Joint Support Dog Treats in the morning, maybe alongside their breakfast, helps ensure they get that dose of turmeric right when they start moving around. It’s all about consistency! They’re so simple, you’ll find yourself reaching for them without even thinking about it. Enjoy seeing your pup happy and mobile!
Final Thoughts on Canine Wellness Recipes
It’s really rewarding to know you’ve got these amazing Joint Support Dog Treats ready to go for your dog. Taking the time to make something healthy and targeted for their specific needs speaks volumes about how much you care!
I hope seeing how simple it is to bring functional nutrition into your routine inspires you to keep exploring. Whether you’re making joint support recipes or just some general homemade dog treats, every little bit helps keep our canine companions feeling their best as they go through life with us. That’s what it’s all about!
About the Author: Clara Reynolds
I’m Clara Reynolds, and I truly believe that food is medicine, especially when it comes to our dogs. My passion centers around developing specialized, easy-to-follow recipes designed to support long-term canine wellness and mobility. I love taking complex nutritional goals and turning them into something you can bake in under an hour!
Amazing 1 Joint Support Dog Treats
Ingredients
Equipment
Method
- Preheat your oven to 350°F.
- Mix the pumpkin puree, egg, oat flour, and turmeric together until you form a dough.
- Shape the dough into small treats on a baking sheet.
- Bake the treats for 15 to 18 minutes.
- Allow the treats to cool completely before you serve them to your dog.