Oh my gosh, are you battling this awful summer heat? My kitchen basically turns into a sauna if I even look at the oven dial! That’s why I’m always searching for ways to keep my pups happy without baking them out of house and home. Seriously, sometimes you just need something delicious *right now* without the fuss.
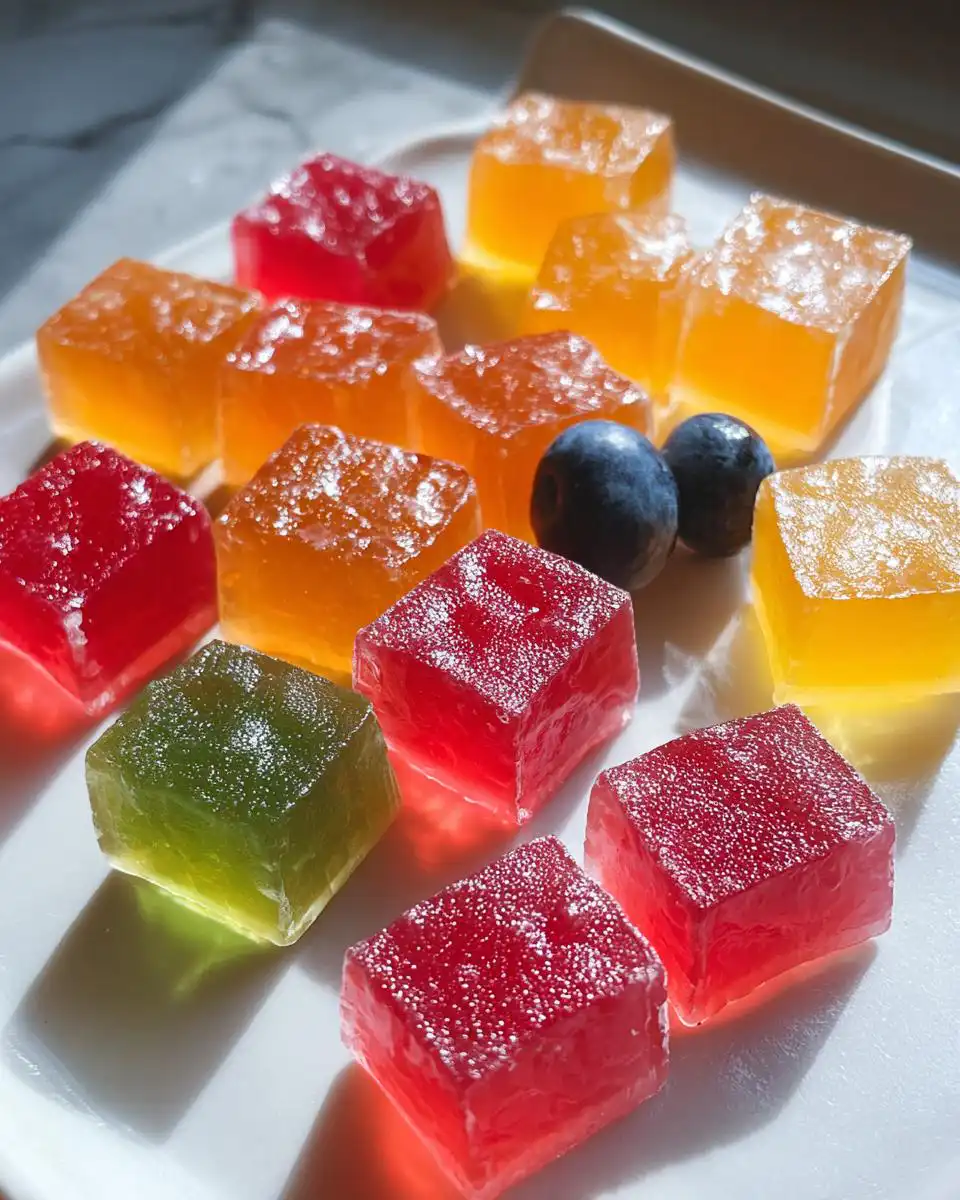
That’s where these amazing no-bake yogurt fruit dog snacks inspired me to create these wonderful No-Bake Fruit Gel Dog Snacks for Dogs. They are incredibly fast to put together—like, 15 minutes, tops—and they rely on simple fruit puree and gelatin to create these soft, chewy treats. Skipping the oven made these snacks perfect for warm days, and they set up beautifully in the fridge. Trust me, your dog is going to go nuts for these fruity little gems!
Why These No-Bake Fruit Gel Dog Snacks for Dogs Are a Must-Make
If you’re like me, you need Creative Dog Treat Ideas that don’t involve turning on the stove when it’s a million degrees outside, right? These treats really shine because they hit all those convenience points while still giving your pup something fantastic. They are wonderful alternatives to things like frozen treats when you need something immediately!
- They deliver that perfect Soft & Chewy Dog Treats texture that dogs just adore.
- They are absolutely perfect for last-minute rewards or packing along on a hike.
- They give you peace of mind knowing exactly what’s going into your pup’s belly—super Healthy Dog Treats Homemade!
Quick Preparation for No-Bake Fruit Gel Dog Snacks for Dogs
Seriously, the huge selling point here is the speed. We’re looking at only 15 minutes of hands-on time, and zero baking! You mix it, you pour it, and you let the fridge do the heavy lifting. It’s the easiest way to get fresh, Gourmet Dog Treats ready for your dog without stressing out your schedule.
Natural Ingredients for Healthy Dog Treats Homemade
I love keeping things simple, so we rely on just a few core items like dog-safe fruit puree and unflavored gelatin. That gelatin is what gives us that wonderful, bouncy texture without messing around with flour or baking powder. It’s pure, natural goodness that feels special without being complicated.
Gathering Supplies for Your No-Bake Fruit Gel Dog Snacks for Dogs
Before we dive into the magic, let’s make sure your kitchen is ready for action! Since these No-Bake Fruit Gel Dog Snacks for Dogs require zero oven time, we focus on what we need for mixing and setting. Getting your tools out first makes the process even faster, trust me on that one. We’re making Dog Treats from Scratch today, so let’s prepare the battlefield!
Essential Equipment for Making Dog Treats from Scratch
You don’t need fancy gear for this recipe at all. Most of this stuff is probably hanging out in your drawers right now. You’ll want:
- A little saucepan for just warming things up briefly.
- A whisk—no fancy mixer required for this!
- Your mold. I usually grab a silicone mold because popping them out is satisfying, but a small baking dish lined with parchment works just as well too.
Ingredients for the Perfect No-Bake Fruit Gel Dog Snacks for Dogs
When making Natural Dog Treat Recipes, the secret to great results is always precise measuring, especially with gelatin! Since we aren’t baking, the ratios here are super important to make sure we get that beautiful, slightly firm, yet soft texture. These few ingredients make all the difference in creating fantastic Dog-Friendly Treat Recipes. Check out what you’ll need for this batch—it makes about 24 little bites!
For the Gel Base:
- 1 cup Water
- 4 packets Unflavored gelatin (Don’t worry, that’s about 1 tablespoon if you measure by weight!)
- 1/2 cup Dog-safe fruit puree (Unsweetened applesauce or plain pumpkin work wonders here.)
- 1 tsp Coconut oil, melted
You can see more great ideas for fruit-based snacks that skip the oven over at my post about cranberry chicken gel dog treats, but for now, let’s focus on getting these measured perfectly!
Step-by-Step Guide to Preparing No-Bake Fruit Gel Dog Snacks for Dogs
Okay, this is where the action happens! Even though we aren’t baking the No-Bake Fruit Gel Dog Snacks for Dogs, the technique for handling gelatin is super important to get that perfect bounce. It’s quick, but you can’t rush the setup time. My favorite part is when the kitchen smells faintly fruity while you work!
Blooming the Gelatin Base
First things first, you have to wake up that gelatin! Take a small saucepan and pour 1/4 cup of your measured water in there. Gently sprinkle all four packets of gelatin right over the top of that water. Don’t stir it! Just let it sit there quietly for about five whole minutes. This waiting period is called “blooming,” and it lets the gelatin granules absorb the water so they dissolve smoothly later on.
Dissolving Gelatin Without Boiling
Once it’s puffed up a bit, set that saucepan over very low heat. You need to use a whisk constantly until everything is clear and smooth. This is my biggest warning: Do NOT let this mixture boil! Boiling ruins the setting power of the gelatin, and we want these to be firm, not soupy. That gentle heat is all it needs!
Combining Fruit Puree and Setting the Mixture
Take the pan off the heat immediately once it’s dissolved. Now, whisk in the rest of that water, your dog-safe fruit puree, and that melted coconut oil. Mix it until it looks completely uniform—no streaks! Carefully pour the whole mixture into your prepared mold or lined dish. Then, pop it into the fridge. You have to wait at least 3 hours, or 180 minutes, for these Dog-Friendly Treat Recipes to set completely firm.
Cutting and Storing Your No-Bake Fruit Gel Dog Snacks for Dogs
When they are totally solid, it’s time to cut them! You can use a knife or those cute bone-shaped cutters I mentioned earlier if you used a dish. Slice them into bite-sized pieces appropriate for your dog. Remember, these need to stay cool, so pop any extras right away into an airtight container in the fridge for later enjoyment. For more tips on making these kinds of treats, check out my guide on dog-friendly cinnamon roll biscuits for inspiration!
Tips for Perfecting Your Creative Dog Treat Ideas
Even though this recipe is super straightforward, there are a couple of little tricks that turn these simple gel snacks into something truly special. If you’re aiming for those Gourmet Dog Treats vibes, pay attention to the cutting! If you used a baking dish instead of a silicone mold, you’ll want to make sure you use a very sharp knife to get clean edges so they don’t look raggedy.
But honestly, my favorite way to level these up is using cookie cutters. Just let the whole slab chill until it’s rock solid, then use little bone or star cutters right on the slab. It takes an extra second or two, but it makes them look like something you bought from a fancy pet bakery. You can find some inspiration for presentation over on my post about gourmet dog treat recipes. It really elevates these super-easy snacks!
Ingredient Notes and Substitutions for No-Bake Fruit Gel Dog Snacks for Dogs
Okay, let’s talk ingredients for our No-Bake Fruit Gel Dog Snacks for Dogs. Since this recipe has so few parts, every single ingredient really needs to be spot-on to ensure we get those perfect Natural Dog Treat Recipes that hold their shape but stay wonderfully soft.
For the gelatin, I always use the standard, unflavored stuff—no need to get fancy there. If you can find small packets, great, but buying it in bulk (which equals about a tablespoon) is often cheaper if you plan on making these often. You absolutely must use unflavored, though; anything fruit-flavored usually has added sugar we don’t want!
Fruit Puree Choices and Safety
This is where you get to be creative, but you have to be smart about it! The fruit puree is what gives these treats their flavor and that lovely color. Plain, unsweetened applesauce is my go-to because it’s super reliable and dogs adore it. Pumpkin puree is another winner, especially in the fall.
The caveat here is safety, always. Before you mash up any fruit, double-check what’s safe for Fido. For instance, grapes are a huge no-no, and you absolutely need to make sure any fruit you use doesn’t have added sugar or sweeteners like xylitol. If you ever have a doubt, please check out this helpful list on foods not to feed your dog. It’s always better to be safe when making Healthy Dog Treats Homemade.
Coconut Oil and Alternatives
The little bit of melted coconut oil we add does wonders! It helps keep the gel from getting too rubbery and adds a great little fatty boost—dogs love the taste! If you don’t have coconut oil on hand, you can swap that teaspoon for an equal amount of melted, plain lard or even unsalted butter if that’s what you have, though coconut oil seems to mix in the cleanest for these gel snacks. If you want ideas on using applesauce in other cool ways, check out my easy applesauce frozen dog snacks recipe!
Storage and Reheating Instructions for Your Homemade Dog Treat Recipes
Since these fantastic treats don’t have any baking involved, how we store them is super important to keep them fresh and safe for our pups! Because they rely on that gelatin base, they definitely need to stay cool unless you plan to feed them all on the day you make them. There’s no reheating needed here—they’re meant to be served chilled, which is great!
You’ll need an airtight container for these. Plastic containers with snapping lids work perfectly, or even a heavy-duty zip-top bag if you squeeze out all the air. Pop that container right into the refrigerator. They stay wonderfully fresh and bouncy in the fridge for up to a week. That’s plenty of time to enjoy them, but I always find they disappear faster than that!
If you happen to make a huge batch (and believe me, you might when you realize how easy they are!), freezing is an option too. If you want to freeze them, check out my super detailed notes on how to freeze other goodies, like my pumpkin peanut butter dog freezer snacks. The same principles will keep your fruit gels in perfect shape until you need them!
Frequently Asked Questions About No-Bake Fruit Gel Dog Snacks for Dogs
It’s always great when you guys have so many good questions about these simple Dog-Friendly Treat Recipes! When you skip the oven, sometimes readers wonder about the stability or the final texture. I’ve gathered a few common things people ask me when they’re whipping up these wonderful No-Bake Fruit Gel Dog Snacks for Dogs. Hopefully, this clears everything up so you can jump right into the mixing bowl!
Can I add dog-safe yogurt to these No-Bake Fruit Gel Dog Snacks for Dogs?
Oh, that’s a really fun idea to try to kick these up a notch! You absolutely *can* add yogurt, but you have to be careful about the quantity and the type. Since yogurt is mostly liquid, if you add too much, it throws off the water-to-gelatin ratio, and your treats won’t set up properly. Try replacing just 1/4 cup of the required water with plain, unsweetened, dog-safe yogurt. If you add too much, you might end up with something closer to a very thick, pliable pudding than a solid gel, so I always recommend starting small!
How long do these soft & chewy dog treats last?
Because we aren’t baking and we’re relying on that refrigeration to keep everything stable, they need to stay cold. These soft & chewy dog treats are fantastic because they last up to a full week if you keep them sealed tight in an airtight container in the fridge. That’s why I always say they are much better than store-bought options, even if they are slightly shorter-lived than baked biscuits. If you want them longer, freeze them, check out my tips on storing other snacks, like those over at soft chewy dog treat recipes!
Are these suitable for puppies?
As long as you are using fruit purees that are safe for whatever stage of teething or training your puppy is in, yes, these are excellent for young pups! They are super soft and easy on little teeth and tummies. Just make sure the pieces you cut are appropriately sized so they aren’t choking hazards, especially since they can be a little squishy!
Why is the texture a little rubbery?
If your No-Bake Fruit Gel Dog Snacks for Dogs come out too rubbery or tough instead of perfectly soft, it usually means one thing: you accidentally boiled the gelatin mixture. Gelatin hates high heat! Remember, we only want it to dissolve over low heat—no bubbles allowed! If you follow that low-and-slow rule, you get that perfect, slightly jiggly texture puppies adore.
Share Your Experience Making These Dog-Friendly Treat Recipes
Well, that’s the whole low-down on making these fantastic, oven-free gel snacks! I truly hope your dogs go wild for these simple, fruity bites. My goal with all these Dog-Friendly Treat Recipes is just to make your life easier while keeping your pups ecstatic and healthy.
I would absolutely love to hear how it went for you! Did your dog have a favorite puree flavor? Please, drop a comment below and tell me how many stars you’re giving these treats! And if you snap a picture of your happy pup enjoying these soft chews, tag us on social media—we always love seeing your sweet faces!
If you want to learn more about my approach to easy, safe kitchen experiments for our furry best friends, feel free to check out my ‘About’ page here: Read More About Happy Pup Kitchen.
By Hanna Sullivan – Recipe Adaptation Specialist. Hanna Sullivan brings her expertise in adapting everyday ingredients into pup-friendly recipes at Happy Pup Kitchen. Her gentle and thoughtful approach ensures that each treat is not only safe but also fun and appealing for dogs of all sizes. Hanna’s mission is to make homemade dog treats simple, reliable, and filled with love.
No-Bake Fruit Gel Dog Snacks for Dogs
Ingredients
Equipment
Method
- Pour 1/4 cup of the water into the small saucepan. Sprinkle the gelatin packets over the water and let it sit for 5 minutes to bloom.
- Place the saucepan over low heat. Whisk constantly until the gelatin is completely dissolved. Do not let the mixture boil.
- Remove the saucepan from the heat. Whisk in the remaining 3/4 cup of water, the fruit puree, and the melted coconut oil until fully combined.
- Carefully pour the liquid mixture into your silicone mold or a small, shallow baking dish lined with parchment paper.
- Transfer the mold to the refrigerator and chill for at least 3 hours, or until the gel is firm.
- Once set, remove the gel from the mold or lift it out using the parchment paper. Cut the large slab into small, bite-sized squares appropriate for your dog.
- Store the finished treats in an airtight container in the refrigerator for up to one week.