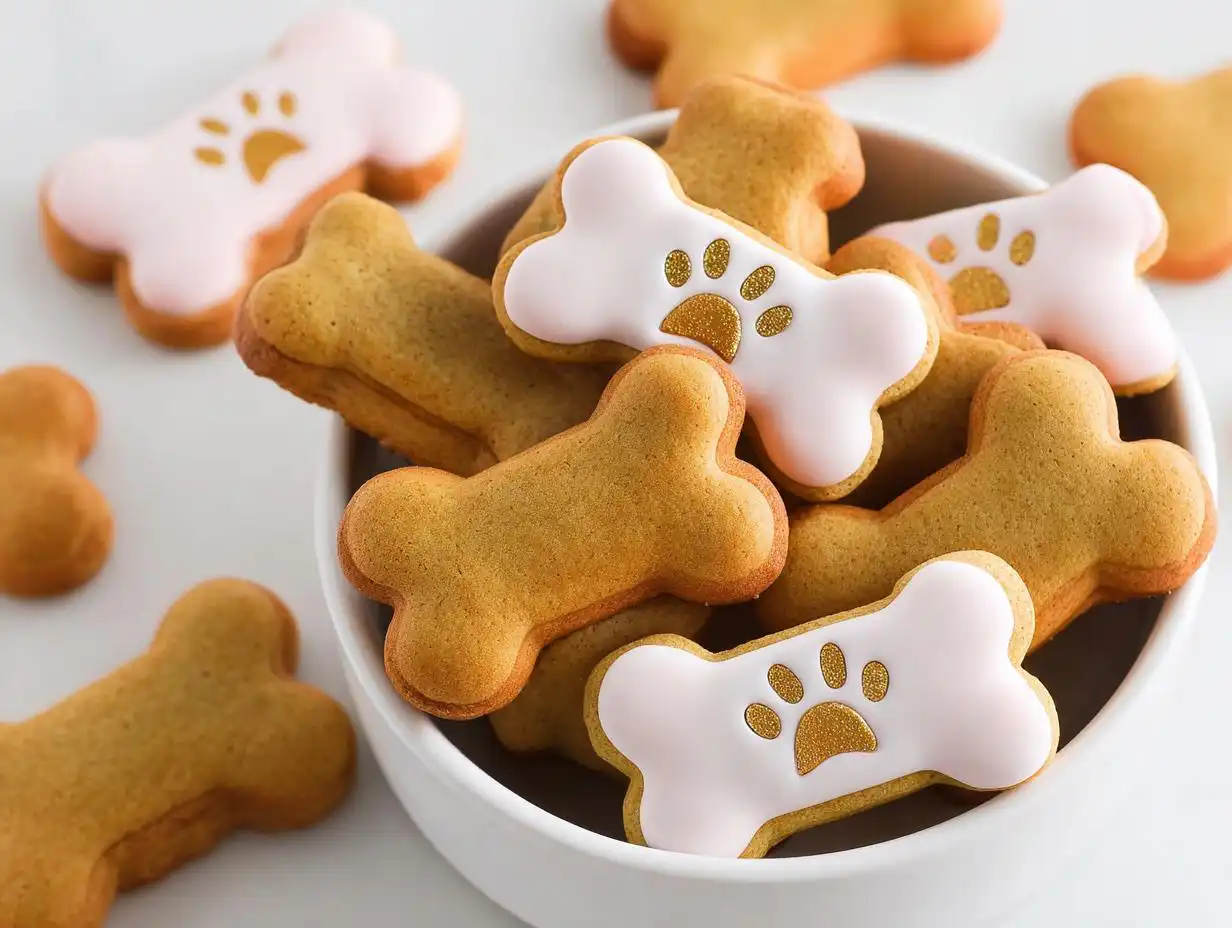
Does your pup deserve a little extra fanfare when they blow out their candles—or at least chew vigorously on something special? I totally get it! Celebrating our furry family members should be fun, easy, and totally safe ingredient-wise. That’s why I swear by these easy, totally cheerful Birthday Dog Cookies recipes.
Honestly, making homemade dog biscuits for special occasions used to stress me out, but these cookies became my favorite way to make celebrations simple and joyful. We’re talking minimal fuss here, folks—just three core ingredients that you probably already have sitting around! This is all about giving your dog a safe, wholesome treat that screams ‘party!’
My goal is always to use ingredients I trust implicitly, because when it comes to my dog’s tummy, I won’t risk anything fancy or questionable. Trust me, these simple bites are going to be better than anything you find in the store for a special day.
Why These Birthday Dog Cookies Are Perfect for Your Pup
When your dog’s big day rolls around, you deserve treats that are as stress-free for you as they are delicious for them! Forget spending all day in the kitchen mixing eighteen different flours. These homemade dog biscuits are designed for maximum fun with minimum mess.
You can feel really good about serving these because they use such basic, wholesome ingredients—no weird preservatives or fillers here! It’s pure celebration fuel made with love.
- Ultimate Simplicity: Seriously, three main ingredients? You can’t beat that level of uncomplicated baking.
- Celebration Ready: These are perfectly portioned for that special ‘present’ moment at your dog’s party. Check out these ideas for dog birthday cake ideas if you need more inspiration!
- Homemade Love: There’s just something extra special about serving something you whipped up yourself, especially for a milestone like a birthday! Don’t forget to look at these mini-cakes too!
Quick Prep for Last-Minute Dog Celebration Treats
This is the best part! If you suddenly realize you forgot to buy something or just remembered it’s Fido’s big day tomorrow, we’ve got you covered. We are talking about 10 minutes of prep time. That’s it! The whole process, from mixing to cooling down on the rack, takes less than half an hour total. You can easily whip up a fresh batch of these dog party treats while you’re wrapping presents or setting up decorations.
Essential Ingredients for Your Birthday Dog Cookies
When we talk about making safe, genuinely good dog celebration treats, simplicity is our secret weapon. You don’t need a whole pantry explosion to make something wonderful. For these homemade dog biscuits, we are sticking to the absolute basics because the fewer ingredients there are, the easier it is to know exactly what your pup is eating!
When I first started experimenting with dog baking, I got a little too complex. Now? I keep it clean. Here’s the short list of what you’ll need to get five perfectly formed cookies.
- 1/2 cup unsweetened applesauce. Make sure it’s just plain applesauce!
- 1 large egg. Just one, binding everything right up.
- 1 cup oat flour. This is what gives the cookie the right structure. You can find recipes online on how to make your own oat flour if you want to try that sometime soon; check out this one for soft oat dog cookies for ideas.
Ingredient Notes and Substitutions for Homemade Dog Biscuits
Okay, let’s talk quality control, because that’s important for showing Expertise! The applesauce is key. You absolutely must ensure that whatever applesauce you grab doesn’t have any sneaky xylitol listed in the ingredients. That sugar substitute is toxic to dogs, so always double-check the label. I always look for a brand that’s simply apples and water.
If you have concerns about apples in general, the American Kennel Club has a great rundown on exactly what dogs can safely eat. They talk all about apples here, which is reassuring!
For the oat flour, if you run out mid-bake, don’t panic. Pulse regular rolled oats in a powerful blender or food processor until they reach a fine, flour-like consistency. That works like a charm in a pinch!
Step-by-Step Guide to Making Amazing Birthday Dog Cookies
Okay, gathering your simple ingredients is half the battle, but now comes the fun part: putting it all together! Don’t worry, this process is so straightforward you’ll wonder why you ever bought store-bought treats. Remember, we’re aiming for five perfect little celebrations for your pup with these Birthday Dog Cookies.
Honestly, making these homemade dog biscuits is so quick that you have time for another baking project if you feel inspired! These simple bites are going to be better than anything you find in the store for a special day. My favorite part about these dog party treats is how rapidly they come together.
First things first, we need to get that oven warmed up and ready to go. You want a nice even bake! The very first thing you do is preheat your oven to 350°F (175°C). Don’t skip this step; it ensures your cookies start baking right away and get that perfect texture.
Mixing the Dough for Your Dog Party Treats
Time to grab that mixing bowl we talked about! This is where the magic happens. You’re going to combine the applesauce and the egg first. Give those a quick whisk just to combine them nicely. Then, slowly start incorporating your oat flour. I really mean slowly here!
You’re mixing until you form a dough. My advice? Mix only until everything is just combined. If you keep mixing oat flour way past the point of it looking like dough, you risk making your final cookies a little tough. We want tender dog party treats, not bricks! Once it comes together like a nice, slightly sticky ball, stop mixing immediately. If you’re wondering what else you can bake, check out some other soft pumpkin or banana recipes!
Baking and Cooling Your Birthday Dog Cookies
Now for the shaping! Since this recipe only makes about five dog celebration treats, you can easily shape them by hand—just roll that dough into five even little balls and flatten them slightly on your baking sheet. You want them about the same thickness so they cook evenly.
Into the preheated oven they go! You’ll bake these for 15 to 18 minutes. How do you know they are done? They should look cooked through, maybe slightly golden around the edges, but remember, we’re not looking for a deep-browned human cookie here. Always pull them out near the 15-minute mark to check first. Once they are done, move them immediately to a wire rack. Seriously, wait until they are completely cool before you hand one over to your very excited pup. Nobody likes a melted-in-your-hand cookie after a big celebration!
Tips for Perfecting Your Birthday Dog Cookies
Okay, so we made exactly five cookies here. Five tiny, perfect moments of joy! If you’re having a big dog party or if your dog just eats treats faster than I can make coffee, you are definitely going to want to scale this up. The good news is that this simple formula doubles or triples like a dream!
When you’re making a huge batch of these Birthday Dog Cookies, the main thing you have to watch out for is baking time. The first batch always cooks faster than the second! Try to keep the cookie thickness uniform when you cut them out or shape them. If you have thicker ones and thinner ones on the same sheet, the thin ones will be rock-hard before the thick ones are done baking.
You know, since these are so simple, they bake up really fast, which is great, but it also means they can go from perfect to just a tiny bit too crunchy if you leave them in a second too long. Always check them right around the 15-minute mark. I find that if I leave them in the oven for just 30 seconds more than I think I should, they lose that lovely, slightly soft chew that makes them superior to store-bought stuff.
Also, if you’re adding anything extra—like maybe a dash of cinnamon or some finely mashed banana alongside the applesauce—make sure you compensate slightly for any extra moisture. Even a little bit more wet stuff means you might need to add just a tiny sprinkle more oat flour to keep that dough workable. It’s all about finding that balance for your perfect batch of dog party treats!
Storing Your Homemade Dog Biscuits
So, you’ve made a gorgeous batch of these simple dog celebration treats! Maybe you managed to make double the original amount, or perhaps your pup just can’t demolish all five cookies in one sitting—a happy problem to have, right?
Since these are made without any preservatives, storage is super important to keep them fresh and safe. You definitely want to keep the moisture locked in so they don’t get stale, but you also need to keep air out so they don’t get weird.
For the very best results, you need an airtight container. I mean *really* airtight. A glass jar with a latch lid is my go-to choice. If you don’t have those fancy jars, a sturdy Tupperware container that seals tightly works just fine. I store mine right on the counter, just like I would store human cookies, if I were ever that brave!
If you keep them sealed up tight at room temperature, they should stay perfectly fresh for about a week. Seriously, a full week! Because they have a little bit of moisture from that applesauce, they won’t last quite as long as those rock-hard store-bought bones, but that’s the trade-off for truly fresh food.
Now, if you are a super planner—and good for you if you are!—you can totally make these ahead of time. I often make a big batch when I have time and then freeze them. You can pop them straight into a freezer-safe bag, squeeze out all the air you can, and they’ll last for about three months! When you’re ready to serve them, just pull out what you need and let them thaw on the counter for an hour or two. This is a great tip for any make-ahead dog treats!
Just remember the golden rule: if you see any hint of fuzziness or weird smells, toss it. Better safe than sorry! But with just applesauce, egg, and oat flour, that usually isn’t a problem.
Serving Suggestions for Dog Celebration Treats
So, you’ve got your beautiful, wholesome Birthday Dog Cookies! Now we need to make sure the presentation matches the effort you put in! You can’t just toss these amazing homemade dog biscuits into the water bowl, right? We want to make this a real event for your dog!
Since these are simple dog celebration treats, they act as the perfect centerpiece for a happy little doggy picnic. Keep the theme going with other simple, dog-safe snacks that match the healthy vibe we’ve got going on here.
Here are a few of my absolute favorite ways to turn these five little bites into a full-blown celebration serving:
- The Icy Sidekick: Pair one cookie with a small scoop of frozen yogurt or dog-safe ice cream. We’re talking about that safe, healthy stuff, not that sugary human dessert! It’s the ultimate birthday cool-down treat.
- The Treat Tower: If you made a large batch, stack them artfully on a small pedestal plate. You can use toothpicks (supervised, of course!) to hold pieces of carrot or apple between the layers to make it look super festive.
- The Thirst Quencher: Always make sure there’s a fresh bowl of water nearby, or better yet, serve them next to a special ‘pup punch’—which is just plain water infused with a few slices of cucumber or watermelon for flavor.
The key is that even though these are just simple homemade dog biscuits, presenting them thoughtfully instantly elevates the moment. Your dog might not care about the fancy plating, but you will, and that makes the memory so much better when you look back on their big day!
Frequently Asked Questions About Birthday Dog Cookies
It’s always smart to ask questions before you bake something new for your best friend! Even though these dog birthday cookies are incredibly simple, dog parents usually have a few specific concerns about ingredients or texture when making homemade dog biscuits. I’ve gathered up some chatter from other dog owners and answered the most common worries below!
Can I add peanut butter to these Birthday Dog Cookies?
Oh, absolutely you can! Most dogs go crazy for peanut butter, and it makes a fantastic addition to dog party treats. The only, and I mean *only*, catch is safety. You must be extremely diligent about checking the label if you decide to add it. Grab a jar of peanut butter that explicitly states it has zero xylitol in it. Xylitol is highly toxic to dogs, so if you see it listed anywhere on the ingredient panel, put the jar down immediately!
If you have confirmed your peanut butter is safe, just swap out a tablespoon or two of the applesauce for the peanut butter. It gives a real depth of flavor to your homemade dog biscuits and most pups don’t even notice the difference when you’re aiming for those special dog birthday cookies.
How do I make these dog celebration treats softer?
That is a great question, especially if you have a senior dog or a puppy whose teeth aren’t quite ready for a hard crunch! Since these Birthday Dog Cookies rely on oat flour, they already have a bit more structure than, say, a cake batter. However, we can definitely tweak the texture.
If you want them softer, the key is in the baking time and the moisture level. First, pull them out of the oven right at the 15-minute mark, even if they look slightly pale. Secondly, when you are mixing the dough, use slightly less oat flour than the recipe calls for— maybe 3/4 of a cup instead of a full cup at first. You want the dough to be slightly sticker, almost feeling like heavy play-dough. This extra moisture will result in a wonderfully chewy texture once cooled. You can also slightly reduce the cooking time when making these as recommended by vets for softer baked goods!
Another bonus tip for softening them up later: store them with half a piece of bread inside the airtight container. The cookies will wick the moisture from the bread, keeping your dog celebration treats velvety soft for days!
Estimated Nutritional Information for These Dog Treats
Since these homemade dog biscuits are made up of just three simple, whole ingredients, you don’t have to worry about any mysterious additives, but it’s always good to know what exactly your dog is enjoying for their special day. Because the recipe yields only five cookies, these numbers are estimates, of course, but they give you a general idea of the wholesome goodness in every bite of your low-calorie dog treats.
This is an approximation based on standard ingredient measurements:
- Calories per cookie: Around 65-75 (Highly dependent on the exact brand/type of applesauce used!)
- Protein: Moderate (thanks to the egg)
- Fat: Low
- Fiber: Good source (from the oat flour)
The beauty here is that it’s all whole food! There are no added sugars, salts, or fats beyond what naturally occurs in the egg and applesauce. It’s a clean celebration, every time.
Share Your Dog’s Joyful Bites
I genuinely hope your pup loves these simple, homemade dog biscuits! I always feel so much better giving my dog a treat that I mixed up myself. If you baked these up for your furry friend’s big day, I’d truly love to hear all about it. Did they inhale them? Did they give you that patented ‘more, please’ look?
Don’t keep that joy to yourself! I encourage you to take a quick snap of your dog enjoying their new favorite snack and share it with the community. Leaving a review or a comment below tells me what recipes are a hit and helps other dog parents find safe treats!
Estimated Nutritional Information for These Dog Treats
Since these homemade dog biscuits are made up of just three simple, whole ingredients, you don’t have to worry about any mysterious additives, but it’s always good to know what exactly your dog is enjoying for their special day. Because the recipe yields only five cookies, these numbers are estimates, of course, but they give you a general idea of the wholesome goodness in every bite of your low-calorie dog treats.
This is an approximation based on standard ingredient measurements:
- Calories per cookie: Around 65-75 (Highly dependent on the exact brand/type of applesauce used!)
- Protein: Moderate (thanks to the egg)
- Fat: Low
- Fiber: Good source (from the oat flour)
The beauty here is that it’s all whole food! There are no added sugars, salts, or fats beyond what naturally occurs in the egg and applesauce. It’s a clean celebration, every time.
Share Your Dog’s Joyful Bites
I genuinely hope your pup loves these simple, homemade dog biscuits! I always feel so much better giving my dog a treat that I mixed up myself. If you baked these up for your furry friend’s big day, I’d truly love to hear all about it. Did they inhale them? Did they give you that patented ‘more, please’ look?
Don’t keep that joy to yourself! I encourage you to take a quick snap of your dog enjoying their new favorite snack and share it with the community. Leaving a review or a comment below tells me what recipes are a hit and helps other dog parents find safe treats! For success tips in the future, check out my About Me page!
5 Amazing Birthday Dog Cookies Joyful Bites
Ingredients
Equipment
Method
- Preheat your oven to 350°F (175°C).
- Mix the applesauce, egg, and oat flour together until you form a dough.
- Shape the dough into five even cookies.
- Bake the cookies for 15 to 18 minutes, or until they are fully cooked.
- Allow the cookies to cool completely before you serve them to your dog.