It’s their special day, right? We can’t just hand them a boring old biscuit when they’ve been such good pups all year long! Celebrating their birthday needs something festive, easy to make last minute, and most importantly, something they can actually gobble up without any tummy trouble. Forget those fancy, human-style cakes; we need soft, manageable treats.
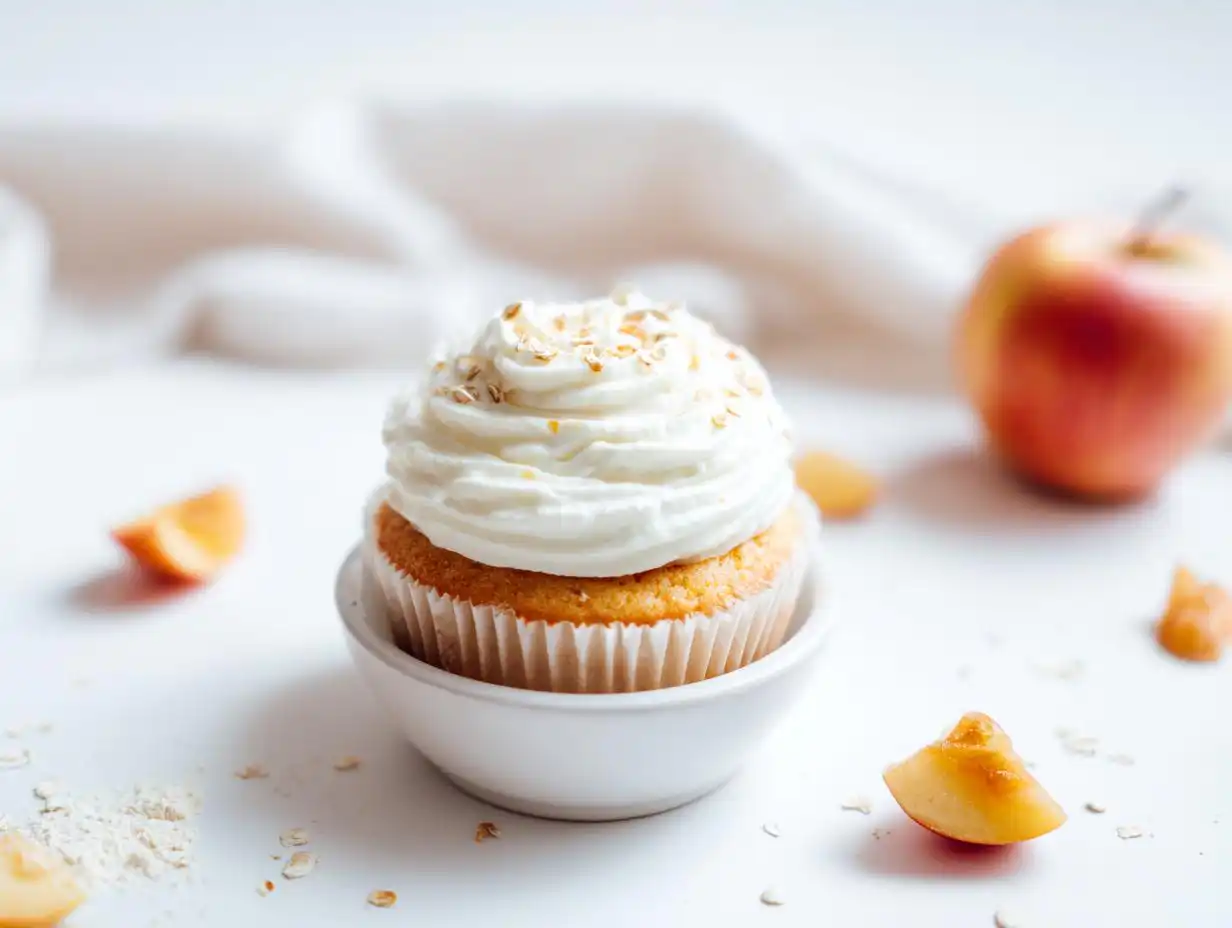
That’s where these simple doggy cakes come in! Yogurt frosting makes them look totally celebratory, but the base is wholesome, soft, and super dog-friendly. Believe me, these Dog Birthday Cupcakes with Yogurt became my absolute go-to for quick and adorable birthday treats the minute I realized how easily I could whip them up. They’re simple homemade dog treats that look professional!
The best part? They require almost no effort, and they only use ingredients you probably already have on hand. You don’t have to worry about making your dog sick since we’re skipping all that sugar and butter. Plus, dogs absolutely adore the cool, creamy plain yogurt topping! You can trust that these are safe and taste-tested by some very happy pups. If your dog can eat yogurt safely, you’ll want to check out what the American Kennel Club says about it too: Can Dogs Eat Yogurt?
Why These Dog Birthday Cupcakes with Yogurt Are Perfect
Honestly, these are a lifesaver when you realize you forgot to plan ahead! These dog birthday treats are perfect because they bake up incredibly soft. That’s crucial, especially for senior dogs or puppies who might have trouble with hard biscuits. The oat flour base keeps everything gentle on their stomachs.
You get that instant festive feeling without the stress of complicated frosting. The plain yogurt topping is so much easier than anything involving powdered sugar blends or heavy cream cheese. Trust me, these homemade dog treats are the easiest way to make your pup feel celebrated. If you love super simple snacks, check out my approach to other easy frosted options, but these cupcakes are my top choice for birthdays!
They are just so quick, usually ready to serve in under an hour from start to finish. Plus, they hold their shape nicely, so they look adorable sitting on their little plate!
Gathering Ingredients for Your Dog Birthday Cupcakes with Yogurt
Okay, let’s talk ingredients! Because these are for our dogs, we need to keep things clear and simple. There is zero room for error here, no fancy extracts or mystery spices allowed! I always lay everything out on the counter first so I know I have it all before I even touch an appliance. This helps me keep track, especially when I’m rushing to get these oat-based dog treats ready!
We are keeping everything super basic, which is why these work so well for most pups. We have two sections: the moist little cake part, and the simple, cooling topping. Check your pantry and see if you have these ready to go. You only need three things for the base!
For the Cupcake Batter
- 1 cup Oat flour (If you don’t have oat flour, just blend rolled oats until they turn powdery—it’s that easy!)
- 1 large Egg (Make sure it’s fresh!)
- 1/2 cup Applesauce (I love using unsweetened applesauce; it adds natural sweetness and moisture without any trouble.)
For the Yogurt Frosting
This is the absolute easiest frosting you will ever make, I promise you! It looks so pretty on top of those little baked cakes.
- Plain yogurt (You’ll need enough just for topping—about a half cup usually does the trick for six cupcakes, but grab a bigger container just in case you sneak a taste before serving yours to the dog!)
Remember, when you’re dealing with yogurt, it must be plain and unsweetened. We don’t want any of those added sugars or, heaven forbid, xylitol in our dog’s treat!
Step-by-Step Instructions for Dog Birthday Cupcakes with Yogurt
Okay, time to get this party started! Since these are so simple, the whole process flies by. Grab your cupcake molds—you know, the standard ones work great for six perfect little treats. We aren’t trying to do anything fancy here, just bake up something happy!
Preparing and Baking the Dog Cupcakes
First things first, get your oven warmed up. You want it set to 350°F (that’s 175°C). While that heats up, mix your wet and dry ingredients for the batter. Seriously, just throw the oat flour, egg, and applesauce into a bowl and mix until it looks like a cohesive batter. Don’t overthink it; this isn’t a fussy cake!
Next, spoon that batter evenly into your prepared cupcake molds. I usually aim for about two tablespoons per cup. Pop them into the oven and set your timer for 15 minutes. You want them baked all the way through—test it by poking the center of one; if it springs back lightly, they are done. This whole base process is what makes a great applesauce-based treat!
Cooling and Frosting Your Dog Birthday Cupcakes with Yogurt
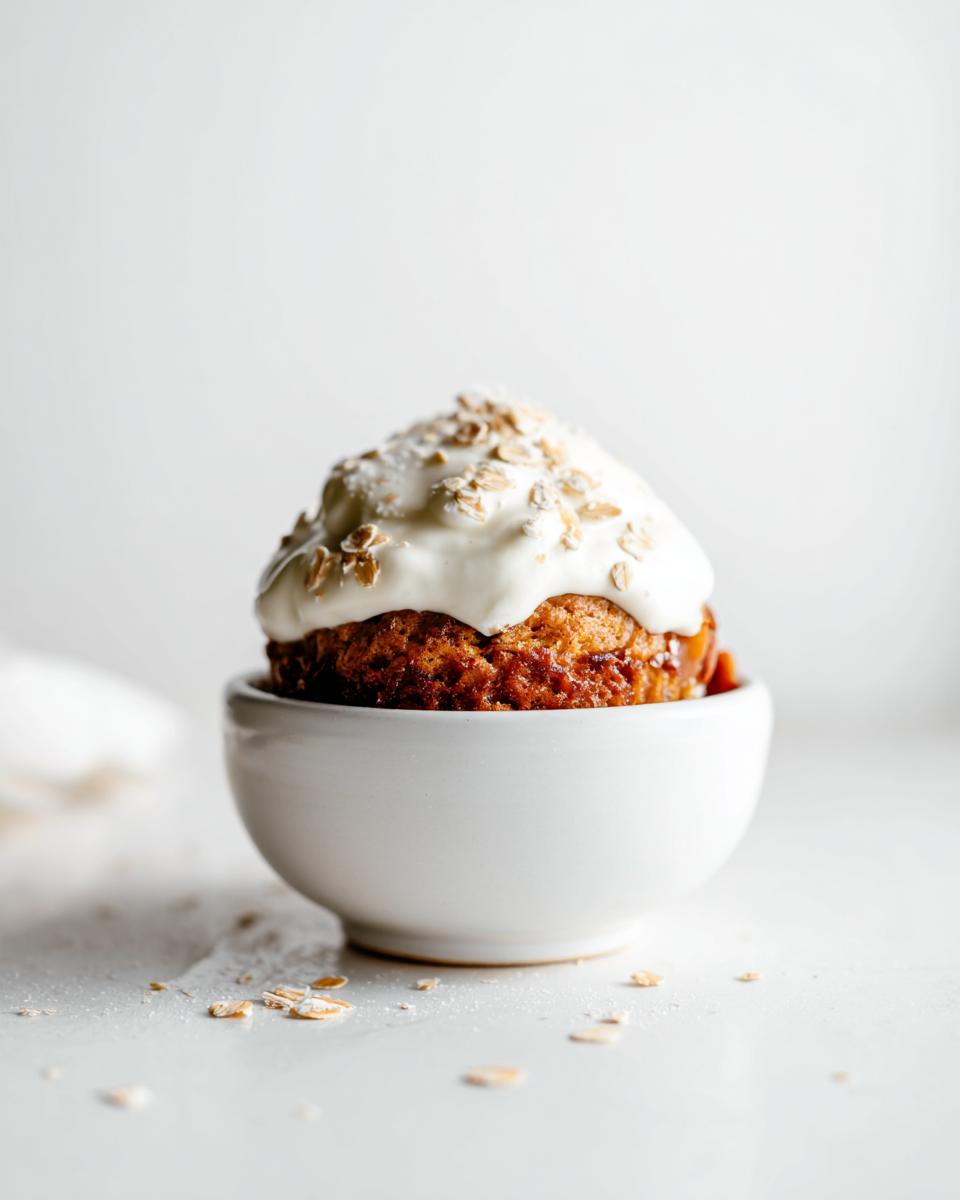
This is the most important (and hardest!) part: you absolutely cannot rush the cooling. If you try to put that cool yogurt frosting on even slightly warm cakes, you’ll end up with yogurt soup all over your counter. Take them out and let them cool down completely. I usually let mine sit on a wire rack for at least 30 minutes.
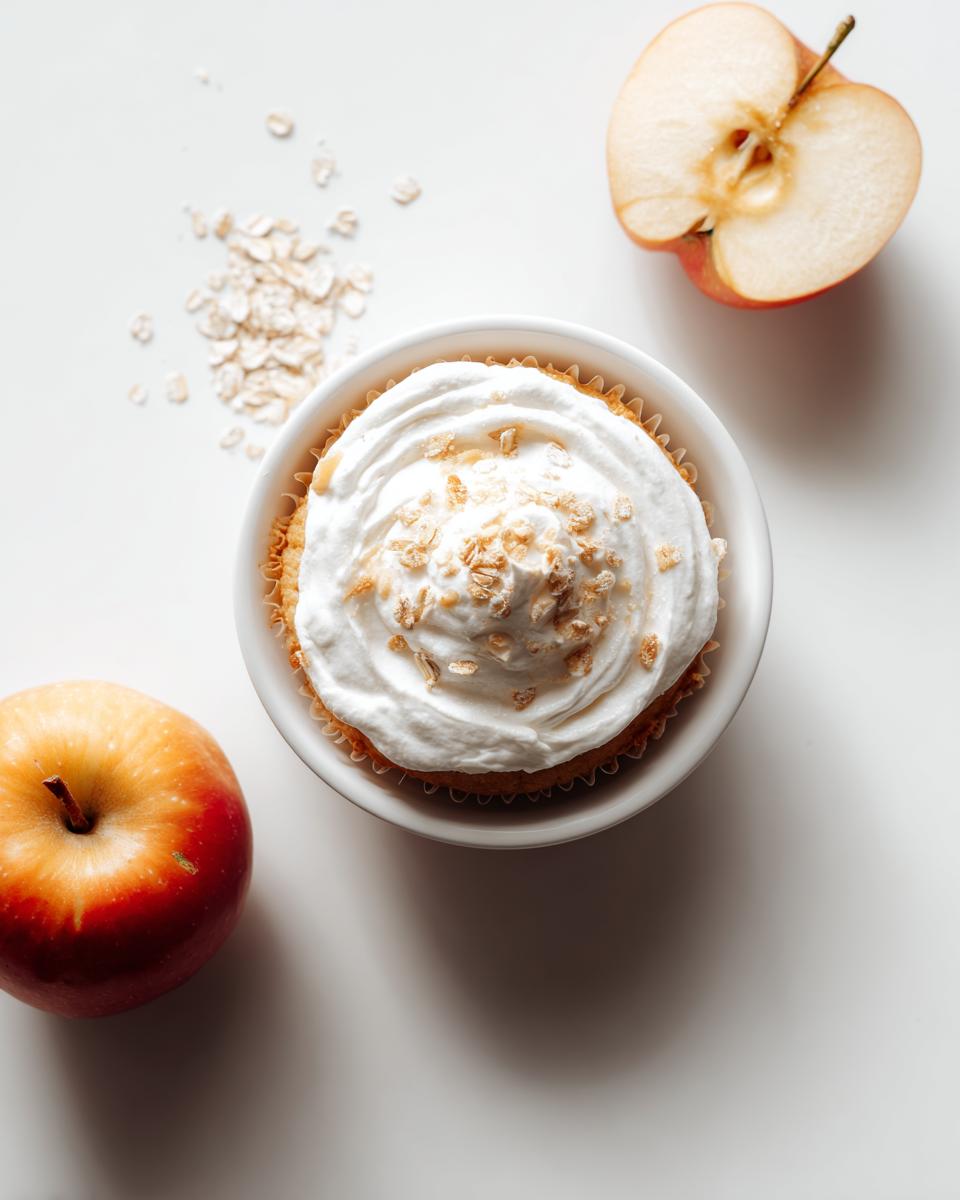
Once they are totally room temperature, it’s frosting time! Just use a small spoon or butter knife to dollop that plain yogurt right on top of each one. You can make cute little swirls if you feel artistic, but honestly, my dogs don’t care if it’s a perfect peak as long as it’s cold and creamy. Make sure your yogurt is safe and unsweetened; you can read more about yogurt safety for dogs here: Can Dogs Eat Yogurt? Safety Guidelines. They are ready for the party once frosted!
Tips for Perfect Dog Birthday Cupcakes with Yogurt
Even though these are super easy, a couple of little tricks make them go from good to “the best dog birthday treats ever.” My biggest secret? I always chill my plain yogurt in the freezer for about 15 minutes right before I use it for frosting.
It doesn’t freeze solid, but getting it really cold stops it from immediately melting into the warm cake crumbs when you apply it. It stiffens up just enough so you can get those adorable little dollops on top without making a huge mess. Trust me, this is key if your kitchen is a little warm!
Also, if you’re making these for a dog with a known sensitive stomach, try swapping half the oat flour for finely ground brown rice flour. It sometimes makes the texture even softer. You can find great suggestions for sensitive stomach dog treats on my other page, but for these cupcakes, sticking to the original recipe is usually best!
Ingredient Notes and Substitutions for Dog Cupcakes
Because these are meant to be the safest, easiest treats for your best friend, we can’t just swap ingredients like we would in our own baking. Everything needs to be dog-friendly, which means we have to be careful about what we change. The oat flour is used here because it’s usually easier to digest than regular wheat flour, but don’t you worry if you’re missing it!
If you are out of oat flour, you can absolutely substitute it with whole wheat flour or even finely ground brown rice flour. But here’s the thing with substitutions: anytime you change the flour, you might need to adjust the applesauce slightly since different flours absorb moisture differently. I’d start with the recipe amount and only add an extra teaspoon if the batter seems too stiff. You are looking for that thick, drizzly consistency, remember?
Now, let’s chat about the yogurt, because this is non-negotiable for both safety and flavor. You MUST stick to plain, unsweetened yogurt. If you grab the strawberry-flavored kind thinking it’ll add sweetness, you’re accidentally loading your dog up with sugars and artificial stuff that just aren’t good for them. Seriously, check the label three times!
If you happen to have leftover plain Greek yogurt, that’s actually fantastic to use for the topping here; it’s thicker, so it holds its shape beautifully when you dollop it on top, much better than regular thin yogurt. For more ideas on mixing seasonal fruit flavors into dog baking, check out my recipe for Carrot Banana Dog Biscuits, just to give you some flavor inspiration!
Storage and Make-Ahead Options for Dog Birthday Cupcakes with Yogurt
So you’ve made a beautiful batch of dog cupcakes, and now you need to figure out how to keep them fresh until the party day, or maybe you want to bake them way ahead of time. Because we are skipping all those preservatives and using plain yogurt as frosting, we have to be smart about storage.
Never leave these out on the counter for too long, especially if it’s warm in your house! That yogurt topping is dairy, so it needs to stay cool to stay safe and keep from melting into a sticky puddle.
Refrigerating Your Yogurt Frosted Cupcakes
The fridge is your best friend here for short-term storage. Once the cupcakes are completely cooled and frosted (that cooling step is so important—don’t forget it!), pop them into an airtight container. Be careful when stacking them; you don’t want that perfect yogurt dollop getting smooshed!
If you’re worried about squishing, you can line a container with wax paper and place the cupcakes in a single layer. They should stay perfectly good in the refrigerator for about three to four days. I find that on day three, they are almost even softer, which is amazing for my older dog!
Freezing for Later Celebrations
If you’re planning a big blowout party a week or two out, freezing is the way to go. This lets you get ahead of the game, which is always helpful when planning a celebration!
However, I strongly recommend you frost them *after* they thaw. If you freeze them with the yogurt topping, the texture of the yogurt can change slightly when it thaws, sometimes getting a little watery. So, here’s my trick: Bake the plain little oat cakes, let them cool, and freeze those bare cakes in a freezer bag—I usually place a small square of parchment between them if I stack them. They freeze beautifully!
Once frozen, they’ll last safely for up to two months. When you need them, just thaw them on the counter for about an hour, then whip up a quick batch of fresh cold yogurt for the topping. It’s like having a fresh batch ready whenever you need one! If you want to look into some other chilly options, check out my ideas for frozen dog treats!
Serving Suggestions for Your Dog Birthday Treats
So, you’ve got these perfectly tiny, frosted birthday treats ready to go. Now we need to make the actual serving part feel like a celebration! These aren’t meant to be the whole meal, obviously, but they are perfect for a little party spread or dessert time.
I always like to serve them slightly chilled, especially if it’s a warmer day, just to make that yogurt topping extra refreshing. A plate of these lined up looks so much cuter than just tossing a few biscuits into a bowl!
If you are having a true birthday bash for your pup, try pairing one of these cupcakes with something cool and hydrating. My dogs go absolutely wild when I serve them one of these yogurt cupcakes alongside one of my special watermelon mint dog pops. It’s like a mini dessert course for a VIP! You can find that recipe for the pops linked in my guide if you want to keep that cool, fruity theme going.
For presentation, I use small paper liners leftover from baking if I didn’t use baking cups, just to make them easy to handle. And if you’re gathering human friends, just make sure to put a cute little sign saying: “For Dogs Only!” Trust me, everyone wants to try them, but we know who the special guest is!
Frequently Asked Questions About Yogurt Dog Cake
I get so many questions about these simple treats! People always want to make sure they are keeping things perfectly safe for their celebration pups. Since we are using ingredients that are usually meant for humans, it makes total sense to double-check everything before you serve them up. Here are the main things people ask me about when making these dog birthday treats.
Can I use flavored yogurt instead of plain for the frosting?
Oh, honey, please don’t! I totally get the temptation because flavored yogurt, like strawberry or vanilla, smells so good, but we have to remember that these homemade dog treats are strictly for the dog. Most flavored yogurts are packed with added sugars, artificial sweeteners, or sometimes even flavoring ingredients that aren’t great for your dog’s digestive system. Always, always stick to plain yogurt—whether it’s regular or Greek yogurt—because it cuts out all those extra things that could cause an upset tummy. Safety first for the birthday boy or girl!
How long do these homemade dog treats last?
This is a great question, especially if you’re batch baking! Since our frosting is just plain yogurt, these treats don’t last nearly as long as the crunchy biscuits we bake. If you store your frosted dog cupcakes in an airtight container in the refrigerator, they are best eaten within three to four days. If you freeze the *unfrosted* cakes, like I recommended earlier, they hold up wonderfully for about two months. When you go to serve them, just thaw them out and add the fresh yogurt topping!
If you’re ever nervous about what exactly your dog can consume, this guide from Dog Health on safe people foods is really helpful to have bookmarked: Safe People Foods for Dogs. It keeps everything straight!
Do you have a question that I didn’t cover here about the yogurt dog cake? Drop it down in the comments below, and I’ll be sure to answer!
Share Your Dog Birthday Cupcakes with Yogurt Creations
Now that you’ve whipped up these adorable frosted celebration cookies for your best friend, I really, truly want to see them! Seriously, there’s nothing better than seeing dogs enjoying these healthy, homemade goodies.
Did your pup give it two paws up? Did they try to single-handedly steal the entire batch before the party even started? Tell me all about it! Snap a picture of your pup enjoying their special dog cupcakes and tag me on social media so I can gush over how adorable they are.
If you made these Dog Birthday Cupcakes with Yogurt and they were a huge hit, please do me a huge favor and come back here and leave a rating—five stars if you loved them! Sometimes a quick note about how soft they turned out or how easily your dog ate them is super helpful for other readers trying to decide if they should bake them next.
Don’t just let the recipe sit there—bake it, share your success, and let the celebration vibes spread! Happy baking, and happy birthday to your wonderful pup!

Dog Birthday Cupcakes with Yogurt
Ingredients
Equipment
Method
- Preheat your oven to 350°F (175°C).
- Mix the oat flour, egg, and applesauce together until you form a batter.
- Divide the batter evenly into your cupcake molds.
- Bake for 15 to 18 minutes, or until the cupcakes are cooked through.
- Remove the cupcakes from the oven and let them cool completely.
- Apply the plain yogurt frosting to the cooled cupcakes before serving them to your dog.