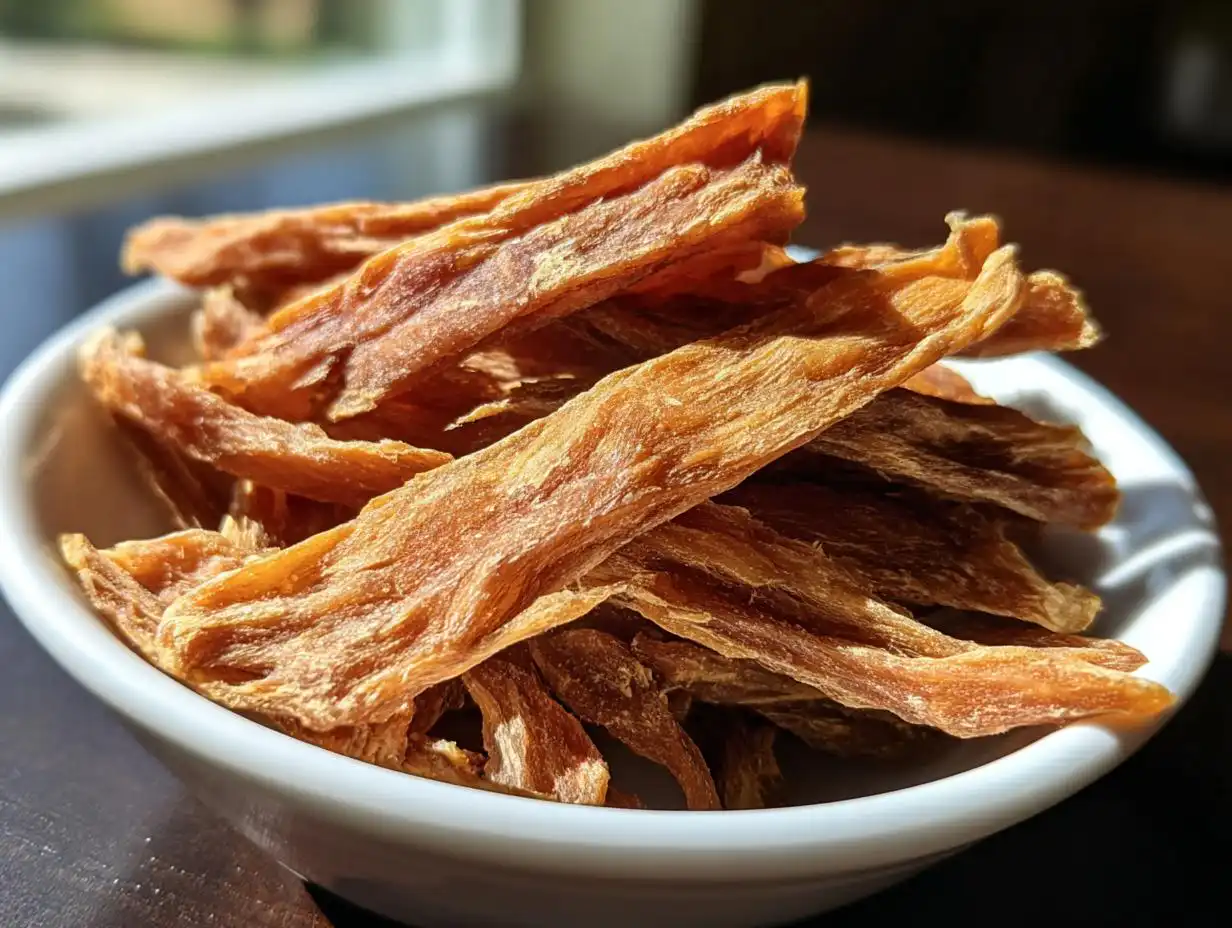
When I’m looking for a super simple, healthy snack for my pup, nothing beats making treats myself! Forget those complicated baking projects; sometimes we just need something pure and protein-packed. Creating amazing Lean Dehydrated Chicken Treats for Dogs is my go-to method because I can ensure they are completely additive-free and low-fat. Seriously, dehydrating lean chicken became a reliable way to create long-lasting snacks without worrying about weird fillers. If you are focused on wholesome preparation, you’re going to love how easy these turn out!
Why You Will Love These Lean Dehydrated Chicken Treats for Dogs
Honestly, making these dog jerky recipes at home gives me such peace of mind. I know exactly what my dog is getting, which is huge when you’re trying to keep things healthy! Plus, they last forever when stored right. You’ll appreciate these benefits:
- Super High Protein: We are starting with pure chicken breast, so these are fantastic for active pups who need quality fuel.
- Incredibly Low Fat: Since we meticulously trim all fat, these treats are perfect for dogs needing to watch their weight or maintain a lean physique.
- Zero Additives or Preservatives: Trust me, you won’t find any weird fillers here! It’s just chicken, made naturally.
- Long Shelf Life: When dried properly, these last months, making large batches of homemade dog chews totally worthwhile.
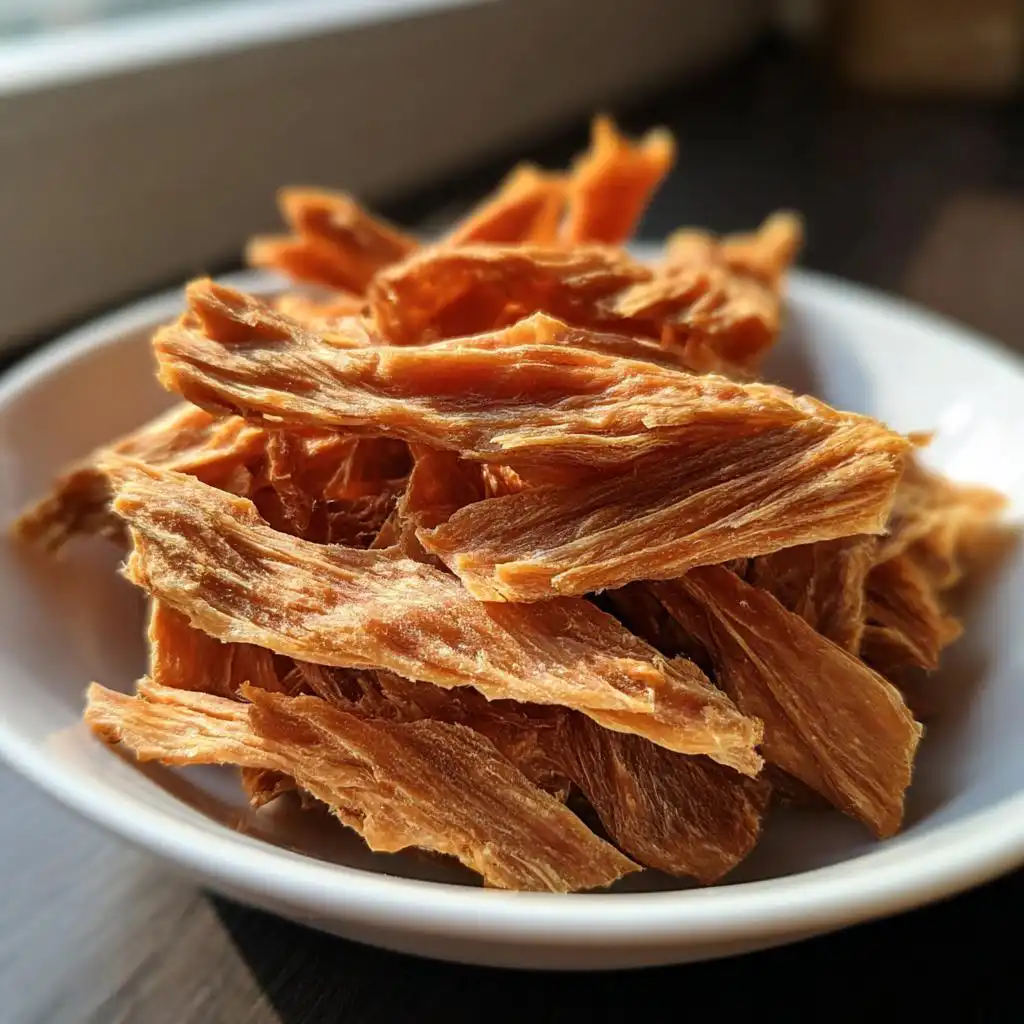
- Perfect Texture for Chewing: They dry to a satisfying hardness that keeps dogs busy working on their snack.
- Simple Ingredient List: If you can buy chicken, you can make these! It doesn’t get much easier for natural dog treat recipes.
Essential Equipment for Making Lean Dehydrated Chicken Treats for Dogs
You don’t need a lot of fancy gadgets to get started making your own DIY dog treats, but one piece of equipment is non-negotiable here. If you are going to venture into dog dehydrator recipes, you definitely need a good machine to do the heavy lifting!
Here is what you need to gather before you start prepping that chicken:
- A reliable Dehydrator (this is your workhorse!)
- A really sharp knife – you need clean cuts for even drying.
- A sturdy cutting board that won’t slip all over the counter.
My biggest tip when it comes to the machine itself: Make sure your dehydrator has adjustable temperature settings. For jerky-style meats like this, you need to hit that 160°F mark initially, which cheaper units sometimes can’t manage. Getting the heat right is key to safety and texture!
Tips for Perfect Dehydrated Dog Treats
When you arrange those chicken strips on the trays, pay close attention to placement. You want to make sure the pieces aren’t touching or overlapping. If they are touching, the air can’t circulate properly around them, and you’ll end up with some strips that are perfectly done and others that are still a little soft in the middle. We are aiming for consistency, so give every strip its own little space to breathe!
Ingredients for Simple Lean Dehydrated Chicken Treats for Dogs
Can we just appreciate how gloriously simple this is? When we talk about making things healthy, sometimes less is truly more. For these wonderful Lean Dehydrated Chicken Treats for Dogs, we are sticking to one main item. Honestly, you don’t need any spices, broths, or vegetable fillers if your goal is pure, lean protein!
You only need 2 pounds of boneless, skinless chicken breast. I know the recipe calls for pounds, but trust me, they shrink down a ton during the drying process, so buy a little extra if you can!
Now, this is the most critical step that separates a great treat from one that might spoil quickly: you MUST trim every single bit of fat and skin away. My tip is to put the chicken in the freezer for just a bit so it firms up. When it’s partially firm, all that white or yellow fat sitting around the edges will be easy to see, and you can slice it right off with your sharp knife. We want zero visible fat remaining because fat doesn’t dry out the same way meat does, and that leftover moisture can cause issues later. Precision here means you get the safest, leanest snacks possible for your pup. For more ideas using chicken, you can check out these dehydrated chicken breast dog treat strips!
Step-by-Step Instructions for Homemade Dog Chews
Okay, now that we have perfectly lean chicken, we can finally get these delightful homemade dog chews started! This process takes a good long while because we are pulling out every bit of moisture, but don’t worry, the machine does all the work. Just follow these steps precisely, and you’ll have jerky your dog will adore. If you’re looking for other simple protein ideas, you can check out how I make single-protein beef jerky treats for dogs!
Preparing the Chicken for Dehydration
Remember when we trimmed that fat? That was important! Next, the trick to getting those beautiful, uniform strips is chilling the meat. Pop your trimmed chicken into the freezer for about 30 to 60 minutes. You want it firm—not rock solid! This chilling makes slicing so much easier. Take your sharp knife and slice the chicken against the grain into strips about 1/4 inch thick. Slicing this way helps the final chew break down nicely instead of getting too tough or stringy in your dog’s mouth.
Setting Up the Dehydrator for Dog Jerky Recipes
Once sliced, gently lay those strips onto your dehydrator trays. Please, please, please make sure nothing is overlapping! If pieces are touching, they won’t dry evenly, and we don’t want that potential soft spot in our finished product. Set your machine temperature exactly to 160 degrees Fahrenheit (71 degrees Celsius). Start the drying time and plan to check around the 8-hour mark. Don’t just walk away; you need to check then to see if they are ready to finish over the next few hours!
Tips for Success with Natural Dog Treat Recipes
Even though these Lean Dehydrated Chicken Treats for Dogs are super simple, a few pro tricks I’ve picked up over the years really guarantee you get that perfect, satisfyingly dry chew every single time. Don’t skip these little details—they make all the difference between a great snack and a truly shelf-stable one!
First up: thickness control. When you slice the chicken, try to be as precise as possible. If you have some pieces that are 1/8 inch thick and others that are 1/4 inch thick, the thin ones will turn into brittle chips while the thick ones might still be chewy in the middle after 10 hours. Using a ruler or even just being hyper-focused on keeping that 1/4 inch measurement consistent is key for these natural dog treat recipes.
Next, let’s talk about achieving true dryness. After the main drying cycle is up—say, at 10 hours—pull out one of your thickest-looking pieces. You need to perform my favorite test, which is technically better than the ‘snap’ test sometimes. Let that piece cool completely, then try to bend it quickly. If it bends even a tiny bit, it’s not done! It should snap cleanly, like, really break apart. If you see any hint of moistness remaining inside when you break it open, pop everything back in for two more hours. Remember, moisture is the enemy when storing homemade dog treats!
Also, never underestimate the resting period. Once you shut the dehydrator off, don’t immediately put the treats in an airtight container, even if they seem dry. Leave the trays sitting out on the counter for at least an hour, maybe longer if your kitchen is humid. This allows any trapped residual heat or steam to escape fully. Skipping this cooling step is how people accidentally trap moisture and end up with soft treats later on. You can also peek at how other great cooks approach their homemade dog food safety over at Canine Journal for extra confidence.
Finally, if you are worried about uneven drying among racks, just rotate them! About halfway through the drying time, swap the bottom rack with the top rack. Air flow isn’t always perfectly consistent from bottom to top in every machine, so giving them a little spin ensures that all your hard work pays off equally across every tray of jerky.
Storage and Shelf Life for Lean Dehydrated Chicken Treats for Dogs
This is where we talk about keeping your amazing work safe! Since we are making truly natural snacks here—no chemical preservatives helping us out—we have to be a little strict with storage for our Lean Dehydrated Chicken Treats for Dogs. If you’ve done the drying job right, they should last a while, but you can’t just leave them sitting on the counter in a paper bag!
Once the treats are completely cool—and I mean completely cool, having rested for an hour or two after they come out of the dehydrator—you need to immediately transfer them into an airtight container. Mason jars work perfectly, or heavy-duty zip-top bags work in a pinch, but airtight is the magic word here.
Now for the safety part that sometimes confuses people when they make DIY dog treats: refrigeration or freezing is required. Because we skipped all the modern preservatives, there’s a tiny, tiny chance of moisture hiding somewhere that could encourage mold growth if left at room temperature for too long. I toss my main batch right into the fridge, which keeps them perfect for several weeks. If you make a huge batch, divide some into freezer bags—they freeze beautifully!
This just guarantees peace of mind. My rule is simple: If it shrinks down this much, it needs to be stored properly! If you are looking for other non-drying methods for preservation, check out my recipe for these Chicken Rice Chew Bites, which use slightly different storage rules.

Variations on Homemade Dog Treats
Once you master these incredible Lean Dehydrated Chicken Treats for Dogs, you might start wondering what else you can safely dry! The beauty of dehydration is that it locks in flavor and nutrients, making it perfect for experimentation—as long as you stick to simple, single ingredients to keep that lean profile we love.
Since we are ditching all those mystery enhancers, my rule of thumb is: if it’s safe for dogs on its own, it’s a great candidate for a variation!
First, let’s talk about a little *flair* after the fact. Once your chicken jerky is totally cooled and dry—and I mean truly dry—you can give it a very light dusting for flavor or freshness. I highly recommend grinding up some fresh parsley! It’s such a wonderful little addition that helps freshen breath without using any questionable fillers. You can find my thoughts on using herbs like that in my recipe for parsley and mint fresheners, but just a tiny sprinkle on the chicken jerky after cooling is lovely.
Next, let’s swap out the protein to keep things interesting! If your dog loves chicken but maybe needs a break, this exact method works flawlessly for other very lean cuts. I often use turkey breast for a fantastic variation on these Dog Jerky Recipes. The secret is the same: trim off absolutely every speck of skin and fat before you start freezing and slicing. Lean pork loin works well too, but you might need to add an extra hour or two to the drying time just to be safe.
Don’t get me wrong, these plain chicken strips are perfect for training because they don’t distract dogs with strong smells, but having a few different textures and flavors on rotation keeps those tail wags high. Every time I switch from chicken to turkey, it’s like I’m serving a brand new snack!

Frequently Asked Questions About Dehydrated Dog Treats
It’s smart to have questions when you’re making something for your best friend! I totally get it. When dealing with raw meat and dehydration, you want to make absolutely sure you’re handling everything correctly to keep those snacks safe and tasty. Here are the top things I hear people ask when they try making their first batch of DIY dog treats.
Are Lean Dehydrated Chicken Treats for Dogs safe to feed daily?
That’s a great question about feeding these treats daily! Because these Lean Dehydrated Chicken Treats for Dogs are virtually pure, high-quality protein and very low in everything else, they are amazing for training rewards or occasional snacks. However, remember the golden rule of dog nutrition: treats, even the healthiest homemade ones, should never make up more than 10% of your dog’s total daily caloric intake. They shouldn’t replace their balanced kibble or main meals. Think of them as high-value rewards, not the main course!
How do I know if my Homemade Dog Treats are fully dehydrated?
This is the MOST important checkpoint for any of the Homemade Dog Treats you make, especially jerky! You can’t rely just on the clock; you have to test visually and mechanically. After the drying time is up, pull out your thickest piece and let it cool completely—this is crucial. Once cool, try to bend it. If it bends even slightly, it’s not done. True dehydration means the piece should snap cleanly in half, with absolutely no moisture visible in the cross-section. If you see any soft, slightly spongy, or damp-looking spots when you break one open, put them all back in for another hour or two! Safety first!
If you are looking for ways to use up extra fruit alongside protein recipes, you might love my apple and cranberry chews for a different texture experience!
Understanding the Nutrition of Healthy Dog Treats Homemade
Since we’re talking about feeding our pups the absolute best, knowing what’s actually *in* the food we prepare is non-negotiable, right? I always track the main macros so I know exactly what I’m rewarding my dog with. These Healthy Dog Treats Homemade are truly simple because they rely on one ingredient, which keeps the math easy!
Based on starting with two pounds of ultra-lean, skinless chicken breast, here are the estimated numbers per treat (remember, the final weight depends entirely on how much moisture you remove!):
- Calories: Approximately 100
- Protein: Around 20 grams
- Fat: Less than 1 gram! How amazing is that?
Now, I have to give you my little reality check here, because transparency is key. Think of these numbers as a very close estimate based on the starting raw weight of lean breast meat. Because the process of dehydration removes so much water, the final nutritional density gets cranked way up! Also, if you happen to leave a tiny bit of fat or miss a small flap of skin (oops!), those numbers will shift immediately. This data serves as a great guideline for understanding that you are feeding something incredibly high in protein and super low in the fats we usually want to avoid in snack time. This is why I love making my own Healthy Dog Treats Homemade—control over those numbers is everything!
Share Your Experience Making These Dog Treats for Chewing
Wow, we made it through the entire process of creating these fantastic Lean Dehydrated Chicken Treats for Dogs! I genuinely hope you and your pup enjoy these simple, high-protein snacks. When you make a batch of these Dog Treats for Chewing, I would absolutely love to hear about it! Did your dog go wild for the jerky texture? Did you have any questions while you were trimming that last bit of fat?
Please take a moment to leave a quick star rating above—it really helps other dog owners find reliable, healthy recipes like this one. And if you made any small modifications or noticed something interesting during your dehydration cycle, drop a comment below! Sharing our journey always helps everyone make better homemade dog treats.
You can check out my main collection of homemade dog treats for even more inspiration!
About the Author: Clara Reynolds
By Clara Reynolds – Canine Nutrition Writer
Clara Reynolds contributes to Happy Pup Kitchen with a focus on safe, wholesome ingredients for dogs. With her background in pet care and food writing, she ensures each recipe is practical, balanced, and easy for owners to recreate at home. Clara is passionate about helping dog lovers prepare treats that are both healthy and tail-waggingly delicious.
Lean Dehydrated Chicken Treats for Dogs
Ingredients
Equipment
Method
- Trim all visible fat from the chicken breasts. Remove any skin or connective tissue.
- Place the chicken in the freezer for 30 to 60 minutes. This firms the meat, making it easier to slice thinly.
- Slice the partially frozen chicken against the grain into strips about 1/4 inch thick. Uniform thickness helps with even drying.
- Arrange the chicken strips on your dehydrator trays. Make sure the pieces do not overlap.
- Set your dehydrator temperature to 160 degrees Fahrenheit (71 degrees Celsius).
- Dehydrate for 8 to 12 hours. Check the treats after 8 hours. They are done when they are dry throughout and snap when bent, but do not crumble.
- Turn off the dehydrator and allow the treats to cool completely on the trays. This allows residual moisture to evaporate.
- Store the cooled treats in an airtight container. For maximum freshness and safety, store them in the refrigerator or freezer.